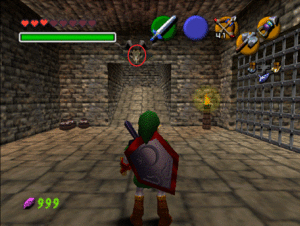
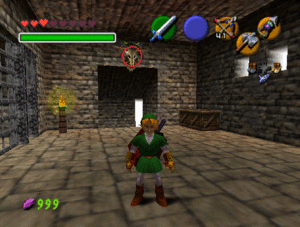
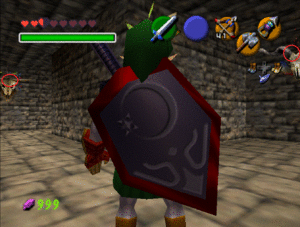
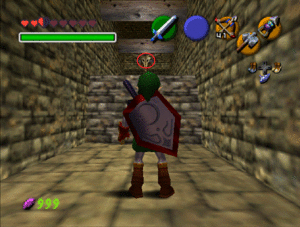
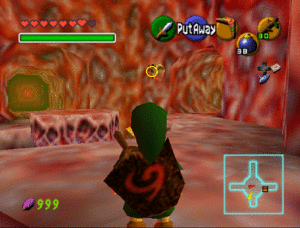
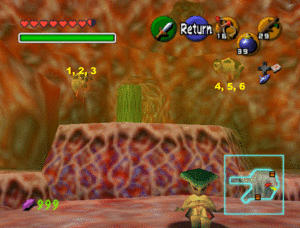
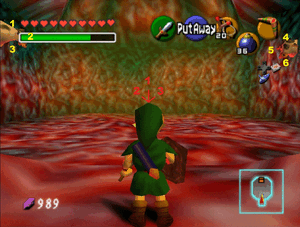
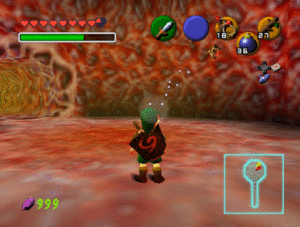
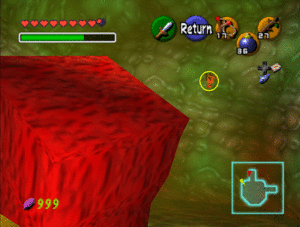
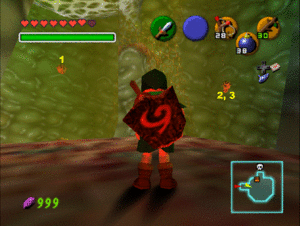
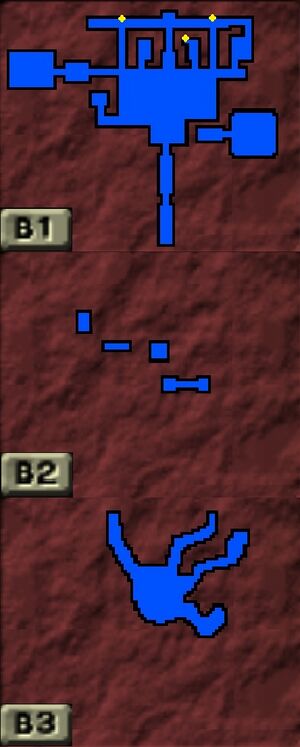
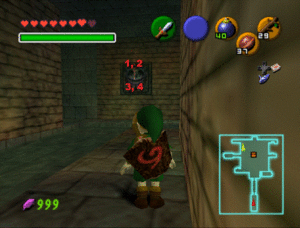
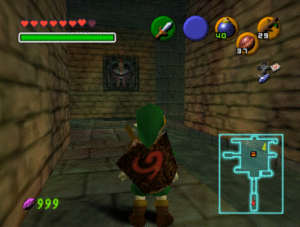
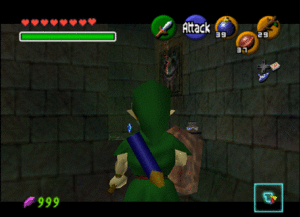
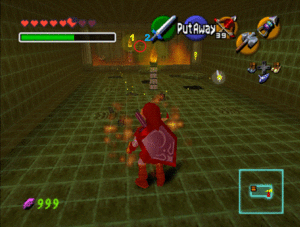
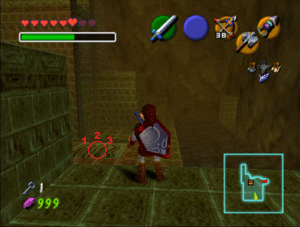
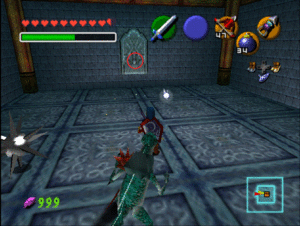
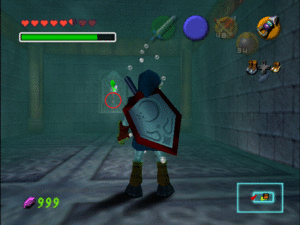
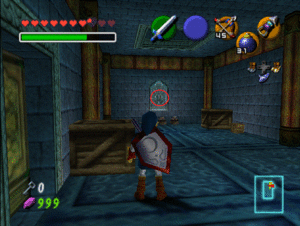
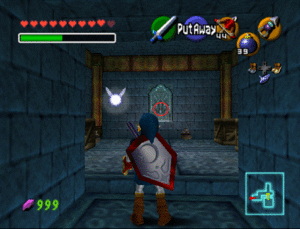
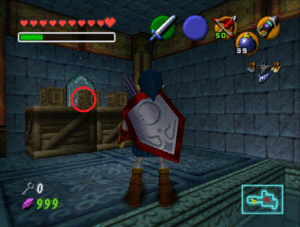
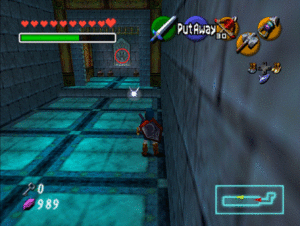
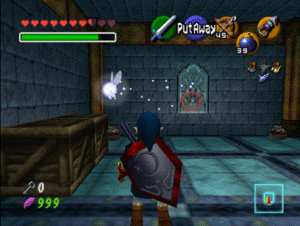
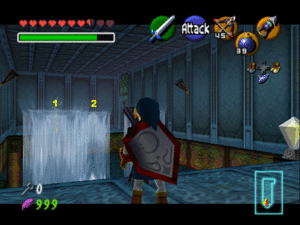
Added the base for each MQ dungeon, pictures to be added next |
Cleaned up the changes to MQ Jabu, give me another ping whenever they add the MQ Shadow Trial item |
||
| (8 intermediate revisions by 3 users not shown) | |||
| Line 1: | Line 1: | ||
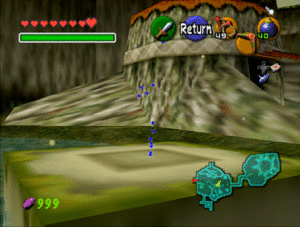
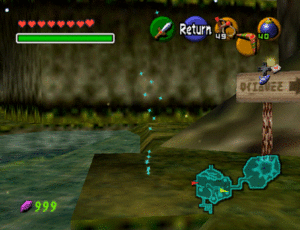
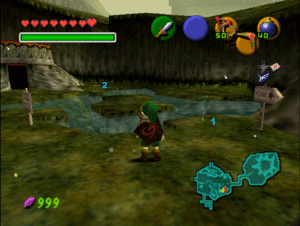
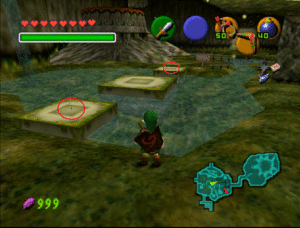
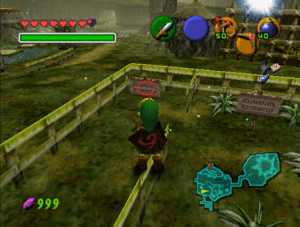
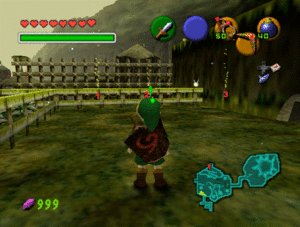
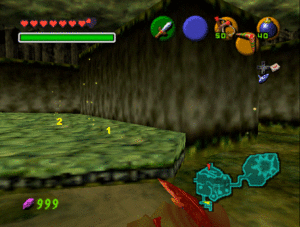
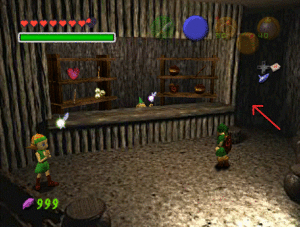
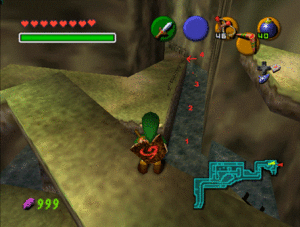
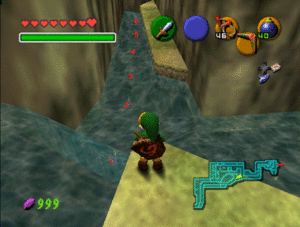
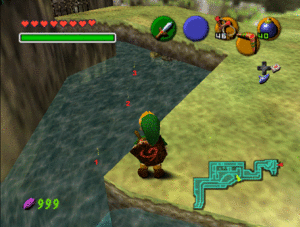
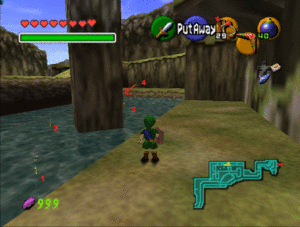
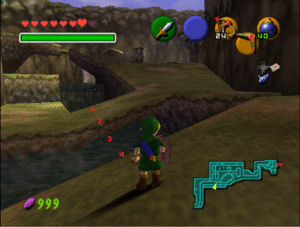
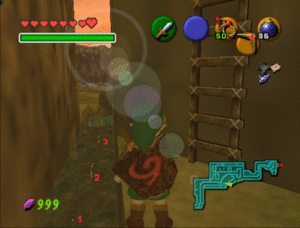
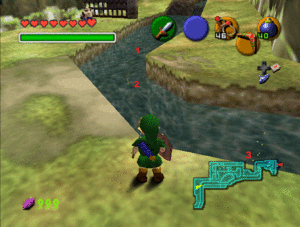
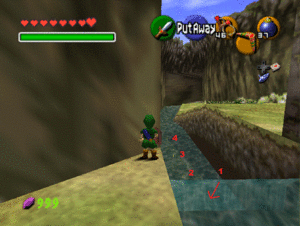
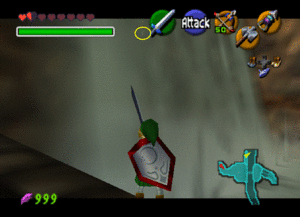
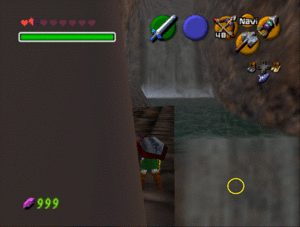
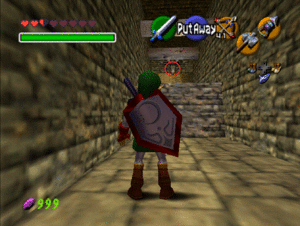
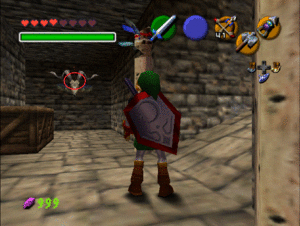
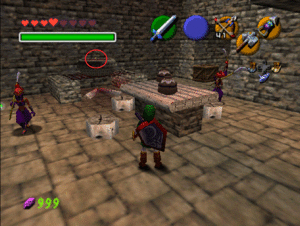
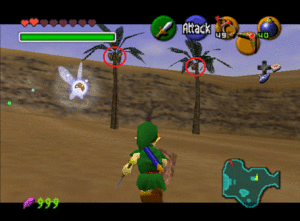
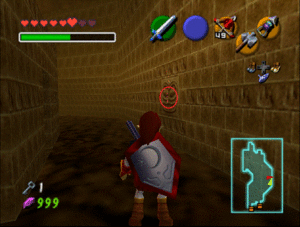
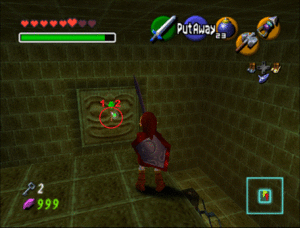
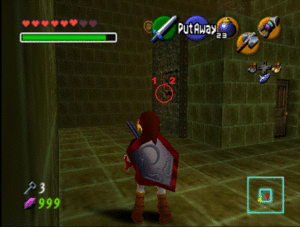
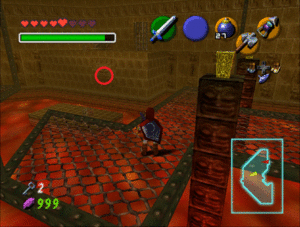
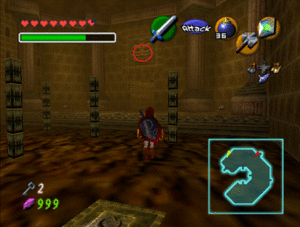
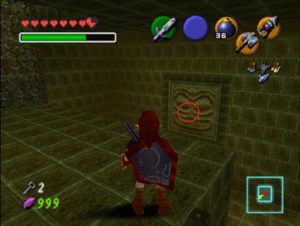
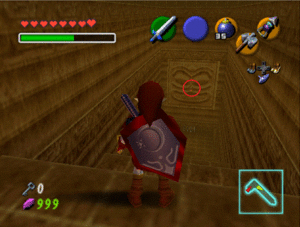
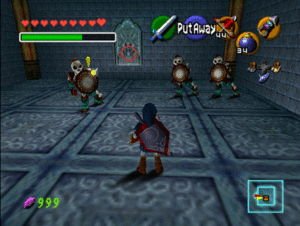
Wonderitems are invisible triggers in the world, either points Link touches (the invisible rupees when swimming down Zora's River) or shoots with an item (the rupees from shooting the Gerudo Fortress signs with a Hookshot). When these are shuffled, they will be highlighted with a sparkling effect. Each type of wonderitem trigger has a different colour, explained below. | Wonderitems are invisible triggers in the world, either points Link touches (the invisible rupees when swimming down Zora's River) or shoots with an item (the rupees from shooting the Gerudo Fortress signs with a Hookshot). When these are shuffled, they will be highlighted with a sparkling effect. Each type of wonderitem trigger has a different colour, explained below. | ||
{{quick reference pages}} | |||
== Types of Wonderitem == | == Types of Wonderitem == | ||
| Line 25: | Line 27: | ||
|} | |} | ||
== Kokiri Forest: 9 Items == | == Overworld == | ||
=== Kokiri Forest: 9 Items === | |||
{| border="0" cellpadding="1" cellspacing="1" width="100%" | {| border="0" cellpadding="1" cellspacing="1" width="100%" | ||
! width="20%" |Location | ! width="20%" |Location | ||
| Line 62: | Line 65: | ||
|} | |} | ||
== Lost Woods: 3 Items == | === Lost Woods: 3 Items === | ||
{| border="0" cellpadding="1" cellspacing="1" width="100%" | {| border="0" cellpadding="1" cellspacing="1" width="100%" | ||
! width="20%" |Location | ! width="20%" |Location | ||
| Line 75: | Line 78: | ||
|} | |} | ||
== Sacred Forest Meadow: 6 Items == | === Sacred Forest Meadow: 6 Items === | ||
{| border="0" cellpadding="1" cellspacing="1" width="100%" | {| border="0" cellpadding="1" cellspacing="1" width="100%" | ||
! width="20%" |Location | ! width="20%" |Location | ||
| Line 94: | Line 97: | ||
|} | |} | ||
== Market: 7 Items == | === Market: 7 Items === | ||
{| border="0" cellpadding="1" cellspacing="1" width="100%" | {| border="0" cellpadding="1" cellspacing="1" width="100%" | ||
! width="20%" |Location | ! width="20%" |Location | ||
| Line 112: | Line 115: | ||
|} | |} | ||
== Hyrule Castle: 13 Items == | === Hyrule Castle: 13 Items === | ||
{| border="0" cellpadding="1" cellspacing="1" width="100%" | {| border="0" cellpadding="1" cellspacing="1" width="100%" | ||
! width="20%" |Location | ! width="20%" |Location | ||
| Line 136: | Line 139: | ||
|} | |} | ||
== Hyrule Field: 3 Items == | === Hyrule Field: 3 Items === | ||
{| border="0" cellpadding="1" cellspacing="1" width="100%" | {| border="0" cellpadding="1" cellspacing="1" width="100%" | ||
! width="20%" |Location | ! width="20%" |Location | ||
| Line 151: | Line 154: | ||
|} | |} | ||
== Kakariko: 2 Items == | === Kakariko: 2 Items === | ||
{| border="0" cellpadding="1" cellspacing="1" width="100%" | {| border="0" cellpadding="1" cellspacing="1" width="100%" | ||
! width="20%" |Location | ! width="20%" |Location | ||
| Line 171: | Line 174: | ||
|} | |} | ||
== Graveyard: 15 Items == | === Graveyard: 15 Items === | ||
{| border="0" cellpadding="1" cellspacing="1" width="100%" | {| border="0" cellpadding="1" cellspacing="1" width="100%" | ||
! width="20%" |Location | ! width="20%" |Location | ||
| Line 184: | Line 187: | ||
|} | |} | ||
== Zora's River: 31 Items == | === Zora's River: 31 Items === | ||
{| border="0" cellpadding="1" cellspacing="1" width="100%" | {| border="0" cellpadding="1" cellspacing="1" width="100%" | ||
! width="20%" |Location | ! width="20%" |Location | ||
| Line 203: | Line 206: | ||
|} | |} | ||
== Lon Lon Ranch: 2 Items == | === Lon Lon Ranch: 2 Items === | ||
{| border="0" cellpadding="1" cellspacing="1" width="100%" | {| border="0" cellpadding="1" cellspacing="1" width="100%" | ||
! width="20%" |Location | ! width="20%" |Location | ||
| Line 216: | Line 219: | ||
|} | |} | ||
== Gerudo Valley: 2 Items == | === Gerudo Valley: 2 Items === | ||
{| border="0" cellpadding="1" cellspacing="1" width="100%" | {| border="0" cellpadding="1" cellspacing="1" width="100%" | ||
! width="20%" |Location | ! width="20%" |Location | ||
| Line 235: | Line 238: | ||
|} | |} | ||
== Gerudo Fortress: 2 Items == | === Gerudo Fortress: 2 Items === | ||
{| border="0" cellpadding="1" cellspacing="1" width="100%" | {| border="0" cellpadding="1" cellspacing="1" width="100%" | ||
! width="20%" |Location | ! width="20%" |Location | ||
| Line 254: | Line 257: | ||
|} | |} | ||
== Thieves' Hideout: 12 Items == | === Thieves' Hideout: 12 Items === | ||
{| border="0" cellpadding="1" cellspacing="1" width="100%" | {| border="0" cellpadding="1" cellspacing="1" width="100%" | ||
! width="20%" |Location | ! width="20%" |Location | ||
| Line 288: | Line 291: | ||
|} | |} | ||
== Desert Colossus: 5 Items == | === Desert Colossus: 5 Items === | ||
{| border="0" cellpadding="1" cellspacing="1" width="100%" | {| border="0" cellpadding="1" cellspacing="1" width="100%" | ||
! width="20%" |Location | ! width="20%" |Location | ||
| Line 311: | Line 314: | ||
|} | |} | ||
== Gerudo Training | == Dungeons == | ||
=== Gerudo Training Ground: 3 Items === | |||
{| border="0" cellpadding="1" cellspacing="1" width="100%" | {| border="0" cellpadding="1" cellspacing="1" width="100%" | ||
! width="20%" |Location | ! width="20%" |Location | ||
| Line 334: | Line 338: | ||
|} | |} | ||
== Shadow Temple: 1 Item == | === Shadow Temple: 1 Item === | ||
{| border="0" cellpadding="1" cellspacing="1" width="100%" | {| border="0" cellpadding="1" cellspacing="1" width="100%" | ||
! width="20%" |Location | ! width="20%" |Location | ||
| Line 347: | Line 351: | ||
|} | |} | ||
== Deku Tree MQ: 4 Items == | == MQ Dungeons == | ||
=== Deku Tree MQ: 4 Items === | |||
{| border="0" cellpadding="1" cellspacing="1" width="100%" | {| border="0" cellpadding="1" cellspacing="1" width="100%" | ||
! width="20%" |Location | ! width="20%" |Location | ||
| Line 355: | Line 361: | ||
|- | |- | ||
|Basement Graves | |Basement Graves | ||
| | |[[File:Deku-mq-graves-wonderitems.gif|thumb]] | ||
| style="text-align:center" |Both | | style="text-align:center" |Both | ||
| style="text-align:center" |Slashed with Sword or Sticks | | style="text-align:center" |Slashed with Sword or Sticks | ||
|} | |} | ||
== Inside Jabu Jabu's Belly MQ: | === Inside Jabu Jabu's Belly MQ: 23 Items === | ||
{| border="0" cellpadding="1" cellspacing="1" width="100%" | {| border="0" cellpadding="1" cellspacing="1" width="100%" | ||
! width="20%" |Location | ! width="20%" |Location | ||
| Line 368: | Line 374: | ||
|- | |- | ||
|Map | |Map | ||
| | |[[File:Jabu-mq-wonderitem-map-update.jpg|thumb]] | ||
|- | |- | ||
|Entryway Cow Left</br>Entryway Cow Right | |Entryway Cow Left</br>Entryway Cow Right | ||
| | |[[File:Jabu-mq-entry-wonderitems.gif|thumb]] | ||
| style="text-align:center" |Child | |||
| style="text-align:center" |Slingshot | |||
|- | |||
|Elevator Cow | |||
|[[File:jabu-mq-elevator-wonderitem.gif|thumb]] | |||
| style="text-align:center" |Child | | style="text-align:center" |Child | ||
| style="text-align:center" |Slingshot | | style="text-align:center" |Slingshot | ||
|- | |- | ||
|Basement Lobby Left Cow x3< | |Basement Lobby Left Cow x3<br>Basement Lobby Right Cow x3 | ||
| | |[[File:Jabu-mq-basement-main-wonderitems.gif|thumb]] | ||
| style="text-align:center" |Child | | style="text-align:center" |Child | ||
| style="text-align:center" |Slingshot, each can be shot three times | | style="text-align:center" |Slingshot, each can be shot three times | ||
|- | |- | ||
|Falling Like-Likes Left Cow x3< | |Falling Like-Likes Left Cow x3<br>Falling Like-Likes Right Cow x3 | ||
| | Falling Like-Likes Grass x3 | ||
|[[File:Jabu-mq-like-like-wonderitems-update.gif|thumb]] | |||
| style="text-align:center" |Child | | style="text-align:center" |Child | ||
| style="text-align:center" |Slingshot, each can be shot three times | | style="text-align:center" |Slingshot for the cows, each can be shot three times | ||
Explosives on the grass, drops three items at once | |||
|- | |- | ||
|After Big Octo Cow | |After Big Octo Cow | ||
| | |[[File:Jabu-mq-after-bigocto-wonderitem.gif|thumb]] | ||
| style="text-align:center" |Child | | style="text-align:center" |Child | ||
| style="text-align:center" |Slingshot | | style="text-align:center" |Slingshot | ||
|- | |- | ||
|Wiggling Platforms Wall Cow | |Wiggling Platforms Wall Cow | ||
| | |[[File:Jabu-mq-wiggler-room-wonderitem.gif|thumb]] | ||
| style="text-align:center" |Child | | style="text-align:center" |Child | ||
| style="text-align:center" |Slingshot | | style="text-align:center" |Slingshot | ||
|- | |- | ||
|Before Boss Left Cow< | |Before Boss Left Cow<br>Before Boss Right Cow x2 | ||
| | |[[File:Jabu-mq-before-barinade-wonderitems.gif|thumb]] | ||
| style="text-align:center" |Child | | style="text-align:center" |Child | ||
| style="text-align:center" |Slingshot | | style="text-align:center" |Slingshot, the right cow can be shot twice (the third shot to open the boss door does not drop an item) | ||
|} | |} | ||
== Bottom of the Well MQ: 12 Items == | === Bottom of the Well MQ: 12 Items === | ||
{| border="0" cellpadding="1" cellspacing="1" width="100%" | {| border="0" cellpadding="1" cellspacing="1" width="100%" | ||
! width="20%" |Location | ! width="20%" |Location | ||
| Line 409: | Line 422: | ||
|- | |- | ||
|Map | |Map | ||
| | |[[File:Well-map-wonderitems.jpg|thumb]] | ||
|- | |- | ||
|Main Area Left Portrait x4 | |Main Area Left Portrait x4 | ||
| | |[[File:Well-mq-left-portrait-wonderitem.gif|thumb]] | ||
| style="text-align:center" |Child | | style="text-align:center" |Child | ||
| style="text-align:center" |Slingshot, can be shot four times | | style="text-align:center" |Slingshot, can be shot four times | ||
|- | |- | ||
|Main Area Right Portrait x4 | |Main Area Right Portrait x4 | ||
| | |[[File:Well-mq-right-portrait-wonderitem.gif|thumb]] | ||
| style="text-align:center" |Child | | style="text-align:center" |Child | ||
| style="text-align:center" |Slingshot, can be shot four times | | style="text-align:center" |Slingshot, can be shot four times | ||
|- | |- | ||
|East Inner Room Portrait x4 | |East Inner Room Portrait x4 | ||
| | |[[File:Well-mq-inner-east-portrait-wonderitem.gif|thumb]] | ||
| style="text-align:center" |Child | | style="text-align:center" |Child | ||
| style="text-align:center" |Slingshot, can be shot four times | | style="text-align:center" |Slingshot, can be shot four times | ||
|} | |} | ||
== Fire Temple MQ: 14 Items == | === Fire Temple MQ: 14 Items === | ||
{| border="0" cellpadding="1" cellspacing="1" width="100%" | {| border="0" cellpadding="1" cellspacing="1" width="100%" | ||
! width="20%" |Location | ! width="20%" |Location | ||
| Line 435: | Line 448: | ||
|- | |- | ||
|Map | |Map | ||
| | |[[File:Fire-wonderitems-map.jpg|thumb]] | ||
|- | |- | ||
|Boss Key Face x2 | |Boss Key Face x2 | ||
| | |[[File:Fire-mq-boss-key-wonderitems.gif|thumb]] | ||
| style="text-align:center" |Adult | | style="text-align:center" |Adult | ||
| style="text-align:center" |Once for Hookshot, once for Bow | | style="text-align:center" |Once for Hookshot, once for Bow | ||
|- | |- | ||
|Shortcut Room Face x3 | |Shortcut Room Face x3 | ||
| | |[[File:Fire-mq-shortcut-room-wonderitems.gif|thumb]] | ||
| style="text-align:center" |Adult | | style="text-align:center" |Adult | ||
| style="text-align:center" |Bonk with Hammer | | style="text-align:center" |Bonk with Hammer | ||
|- | |- | ||
|Lizalfos Maze Entry Face | |Lizalfos Maze Entry Face | ||
| | |[[File:Fire-mq-lizalfos-maze-wonderitem.gif|thumb]] | ||
| style="text-align:center" |Adult | | style="text-align:center" |Adult | ||
| style="text-align:center" |Hookshot | | style="text-align:center" |Hookshot | ||
|- | |- | ||
|East Tower Climb Large Face x2 | |East Tower Climb Large Face x2 | ||
| | |[[File:Fire-mq-east-tower-climb-1.gif|thumb]] | ||
| style="text-align:center" |Adult | | style="text-align:center" |Adult | ||
| style="text-align:center" |Hookshot, can be shot twice | | style="text-align:center" |Hookshot, can be shot twice | ||
|- | |- | ||
|East Tower Climb Small Face x2 | |East Tower Climb Small Face x2 | ||
| | |[[File:Fire-mq-east-tower-climb-2.gif|thumb]] | ||
| style="text-align:center" |Adult | | style="text-align:center" |Adult | ||
| style="text-align:center" |Hookshot, can be shot twice | | style="text-align:center" |Hookshot, can be shot twice | ||
|- | |- | ||
|Torch Puzzle Room Face | |Torch Puzzle Room Face | ||
| | |[[File:Fire-mq-torch-puzzle-room-wonderitem-fix.gif|thumb]] | ||
| style="text-align:center" |Adult | | style="text-align:center" |Adult | ||
| style="text-align:center" |Hookshot | | style="text-align:center" |Hookshot | ||
|- | |- | ||
|End of Fire Maze Face | |End of Fire Maze Face | ||
| | |[[File:Fire-mq-beyond-fire-maze-wonderitem.gif|thumb]] | ||
| style="text-align:center" |Adult | | style="text-align:center" |Adult | ||
| style="text-align:center" |Hookshot | | style="text-align:center" |Hookshot | ||
|- | |- | ||
|Above Flare Dancer Face | |Above Flare Dancer Face | ||
| | |[[File:Fire-mq-west-tower-climb-wonderitem.gif|thumb]] | ||
| style="text-align:center" |Adult | | style="text-align:center" |Adult | ||
| style="text-align:center" |Hookshot | | style="text-align:center" |Hookshot | ||
|- | |- | ||
|Hammer Staircase Face | |Hammer Staircase Face | ||
| | |[[File:Fire-mq-hammer-staircase-wonderitem.gif|thumb]] | ||
| style="text-align:center" |Adult | | style="text-align:center" |Adult | ||
| style="text-align:center" |Hookshot | | style="text-align:center" |Hookshot | ||
|} | |} | ||
== Water Temple MQ: 22 Items == | === Water Temple MQ: 22 Items === | ||
{| border="0" cellpadding="1" cellspacing="1" width="100%" | {| border="0" cellpadding="1" cellspacing="1" width="100%" | ||
! width="20%" |Location | ! width="20%" |Location | ||
| Line 491: | Line 504: | ||
|- | |- | ||
|Map | |Map | ||
| | |[[File:Water-mq-wonderitem-map.jpg|thumb]] | ||
|- | |- | ||
|Triple Stalfos Room Portrait | |Triple Stalfos Room Portrait | ||
| | |[[File:Water-mq-triple-stalfos-wonderitem.gif|thumb]] | ||
| style="text-align:center" |Adult | | style="text-align:center" |Adult | ||
| style="text-align:center" |Hookshot | | style="text-align:center" |Hookshot | ||
|- | |- | ||
|Spike & Lizalfos Room Portrait | |Spike & Lizalfos Room Portrait | ||
| | |[[File:Water-mq-lizalfos-spike-wonderitem.gif|thumb]] | ||
| style="text-align:center" |Adult | | style="text-align:center" |Adult | ||
| style="text-align:center" |Hookshot | | style="text-align:center" |Hookshot | ||
|- | |- | ||
|Longshot | |Longshot Alcove Portrait | ||
| | |[[File:Water-mq-longshot-wonderitem.gif|thumb]] | ||
| style="text-align:center" |Adult | | style="text-align:center" |Adult | ||
| style="text-align:center" |Hookshot | | style="text-align:center" |Hookshot | ||
|- | |- | ||
|Above 2F West Room Portrait | |Above 2F West Room Portrait | ||
| | |[[File:Water-mq-2F-west-room-wonderitem.gif|thumb]] | ||
| style="text-align:center" |Adult | |||
| style="text-align:center" |Hookshot | |||
|- | |||
|Lizalfos Hallway Portrait | |||
|[[File:Water-mq-lizalfos-hallway-wonderitem.gif|thumb]] | |||
| style="text-align:center" |Adult | | style="text-align:center" |Adult | ||
| style="text-align:center" |Hookshot | | style="text-align:center" |Hookshot | ||
|- | |- | ||
|Under Central Pillar Portrait | |Under Central Pillar Portrait | ||
| | |[[File:Water-mq-central-pillar-wonderitem.gif|thumb]] | ||
| style="text-align:center" |Adult | | style="text-align:center" |Adult | ||
| style="text-align:center" |Hookshot | | style="text-align:center" |Hookshot | ||
|- | |- | ||
|Hookshot Staircase Left Portrait x3</br>Hookshot Staircase Right Portrait x3 | |Hookshot Staircase Left Portrait x3</br>Hookshot Staircase Right Portrait x3 | ||
| | |[[File:Water-mq-hookshot-stairs-wonderitem.gif|thumb]] | ||
| style="text-align:center" |Adult | | style="text-align:center" |Adult | ||
| style="text-align:center" |Hookshot | | style="text-align:center" |Hookshot | ||
|- | |- | ||
|After Dark Link Room Portrait | |After Dark Link Room Portrait | ||
| | |[[File:Water-mq-above-river-wonderitem.gif|thumb]] | ||
| style="text-align:center" |Adult | | style="text-align:center" |Adult | ||
| style="text-align:center" |Hookshot | | style="text-align:center" |Hookshot | ||
|- | |- | ||
|Dragon Statue Eyes x2 | |Dragon Statue Eyes x2 | ||
| | |[[File:Water-mq-dragon-eyes-wonderitem.gif|thumb]] | ||
| style="text-align:center" |Adult | | style="text-align:center" |Adult | ||
| style="text-align:center" |Hookshot | | style="text-align:center" |Hookshot | ||
|- | |- | ||
|Dragon Room Portrait | |Dragon Room Portrait | ||
| | |[[File:Water-mq-dragon-portrait-wonderitem.gif|thumb]] | ||
| style="text-align:center" |Adult | | style="text-align:center" |Adult | ||
| style="text-align:center" |Hookshot | | style="text-align:center" |Hookshot | ||
|- | |- | ||
|Triple Torches Portrait | |Triple Torches Portrait | ||
| | |[[File:Water-mq-triple-torch-room-wonderitem.gif|thumb]] | ||
| style="text-align:center" |Adult | | style="text-align:center" |Adult | ||
| style="text-align:center" |Hookshot or Bow | | style="text-align:center" |Hookshot or Bow | ||
|- | |- | ||
|Freestanding Item Room Portrait | |Freestanding Item Room Portrait | ||
| | |[[File:Water-mq-freestanding-room-portrait-wonderitem.gif|thumb]] | ||
| style="text-align:center" |Adult | | style="text-align:center" |Adult | ||
| style="text-align:center" |Hookshot | | style="text-align:center" |Hookshot | ||
|- | |- | ||
|Triple Water Spouts x2 | |Triple Water Spouts x2 | ||
| | |[[File:Water-mq-triple-water-spout-wonderitem.gif|thumb]] | ||
| style="text-align:center" |Adult | | style="text-align:center" |Adult | ||
| style="text-align:center" |None | | style="text-align:center" |None | ||
|- | |- | ||
|Boss Hallway Left Portrait</br>Boss Hallway Right Portrait | |Boss Hallway Left Portrait</br>Boss Hallway Right Portrait | ||
| | |[[File:Water-mq-boss-hallway-portraits.gif|thumb]] | ||
| style="text-align:center" |Adult | | style="text-align:center" |Adult | ||
| style="text-align:center" |Hookshot | | style="text-align:center" |Hookshot | ||
|} | |} | ||
== Shadow Temple MQ: 1 Item == | === Shadow Temple MQ: 1 Item === | ||
{| border="0" cellpadding="1" cellspacing="1" width="100%" | {| border="0" cellpadding="1" cellspacing="1" width="100%" | ||
! width="20%" |Location | ! width="20%" |Location | ||
| Line 572: | Line 590: | ||
|} | |} | ||
== Spirit Temple MQ: 2 Items == | === Spirit Temple MQ: 2 Items === | ||
{| border="0" cellpadding="1" cellspacing="1" width="100%" | {| border="0" cellpadding="1" cellspacing="1" width="100%" | ||
! width="20%" |Location | ! width="20%" |Location | ||
| Line 580: | Line 598: | ||
|- | |- | ||
|Chest Switch x2 | |Chest Switch x2 | ||
| | |[[File:Spirit-mq-chest-switch-wonderitem.gif|thumb]] | ||
| style="text-align:center" |Adult | | style="text-align:center" |Adult | ||
| style="text-align:center" |One when slashed with sword, one when bonking with Hammer | | style="text-align:center" |One when slashed with sword, one when bonking with Hammer | ||
|} | |} | ||
== Gerudo Training | === Gerudo Training Ground MQ: 2 Items === | ||
{| border="0" cellpadding="1" cellspacing="1" width="100%" | {| border="0" cellpadding="1" cellspacing="1" width="100%" | ||
! width="20%" |Location | ! width="20%" |Location | ||
| Line 592: | Line 610: | ||
! style="text-align:center" |Notes | ! style="text-align:center" |Notes | ||
|- | |- | ||
| | |Dodongo Room Wall | ||
| | |[[File:Gtg-mq-dodongo-wonderitem.gif|thumb]] | ||
| style="text-align:center" |Adult | | style="text-align:center" |Adult | ||
| style="text-align:center" |Bow | | style="text-align:center" |Bow | ||
|- | |- | ||
|Top of Eye Statue | |Top of Eye Statue | ||
| | |[[File:Gtg-eye-statue-wonderitem.gif|thumb]] | ||
| style="text-align:center" |Adult | | style="text-align:center" |Adult | ||
| style="text-align:center" |Hover Boots | | style="text-align:center" |Hover Boots | ||
|} | |} | ||
Latest revision as of 14:08, 1 December 2024
Wonderitems are invisible triggers in the world, either points Link touches (the invisible rupees when swimming down Zora's River) or shoots with an item (the rupees from shooting the Gerudo Fortress signs with a Hookshot). When these are shuffled, they will be highlighted with a sparkling effect. Each type of wonderitem trigger has a different colour, explained below.
Other quick reference pages:
Types of Wonderitem
Overworld
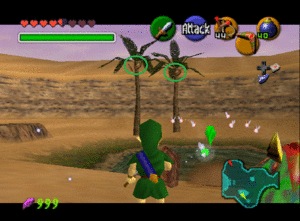
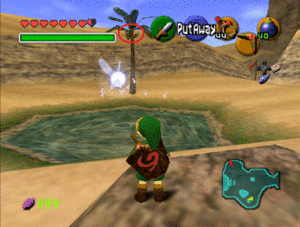
Kokiri Forest: 9 Items
Lost Woods: 3 Items
| Location | Image | Age | Notes |
|---|---|---|---|
| Ocarina Game Grass x3 | 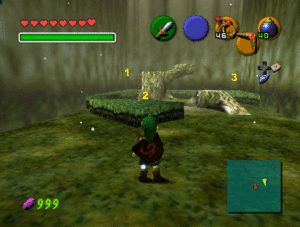 |
Child |
Sacred Forest Meadow: 6 Items
| Location | Image | Age | Notes |
|---|---|---|---|
| Entrance Grass x1 | 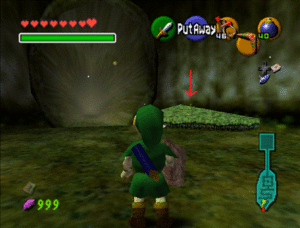 |
Child | |
| Maze Alcoves x5 | 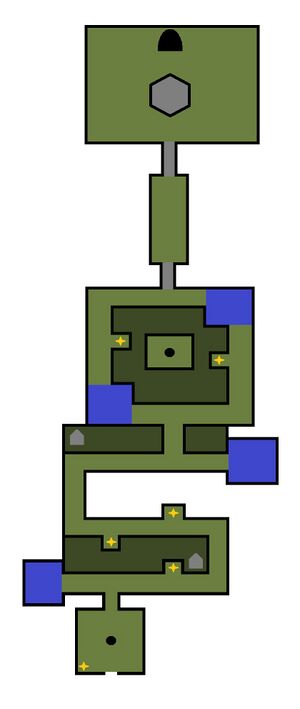 |
Child |
Market: 7 Items
| Location | Image | Age | Notes |
|---|---|---|---|
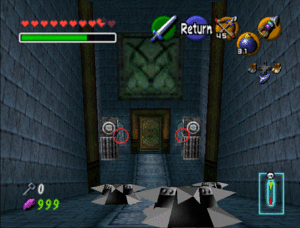
| Daytime Balcony x5 | 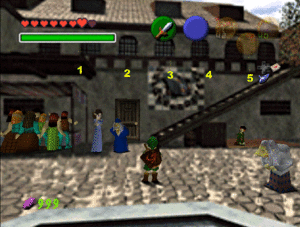 |
Child | Only available during the day |
| Nighttime Balcony x2 | 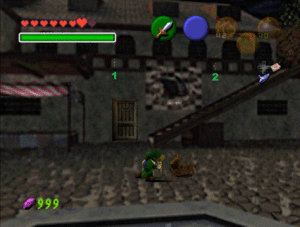 |
Child | Only available at night |
Hyrule Castle: 13 Items
| Location | Image | Age | Notes |
|---|---|---|---|
| Drawbridge Torches 2 | 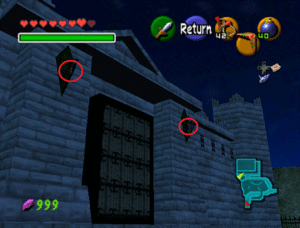 |
Child | Must be shot with a Slingshot |
| Castle Moat x 10 | 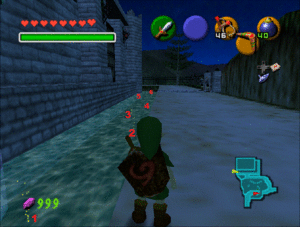 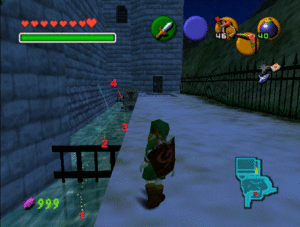 |
Child | |
| Courtyard Mario Painting | 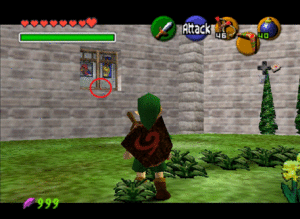 |
Child | Must be shot with a Slingshot |
Hyrule Field: 3 Items
| Location | Image | Age | Notes |
|---|---|---|---|
| Drawbridge x3 | 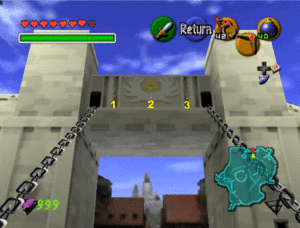 |
Child | |
Kakariko: 2 Items
| Location | Image | Age | Notes |
|---|---|---|---|
| Building Under Construction | 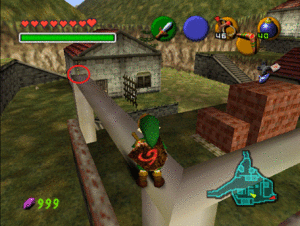 |
Child | The carpenter can be avoided by ledge-grabbing |
| Impa's House | 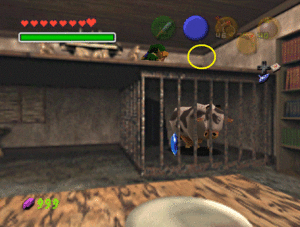 |
Both |
Graveyard: 15 Items
| Location | Image | Age | Notes |
|---|---|---|---|
| Dampe Race x15 | 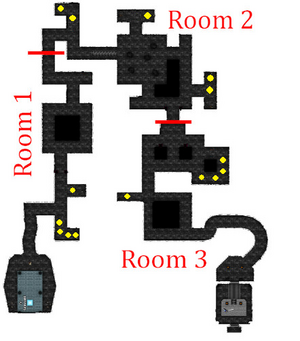 |
Adult |
Zora's River: 31 Items
Lon Lon Ranch: 2 Items
| Location | Image | Age | Notes |
|---|---|---|---|
| Hurdles x2 | 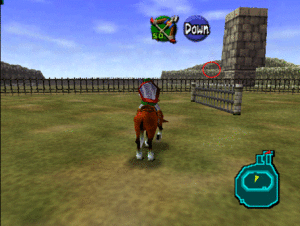 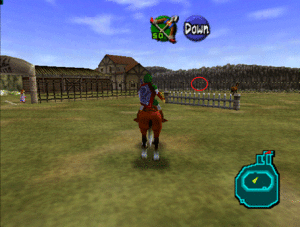 |
Adult | Need to jump into them on Epona |
Gerudo Valley: 2 Items
Gerudo Fortress: 2 Items
| Location | Image | Age | Notes |
|---|---|---|---|
| Entryway Sign | 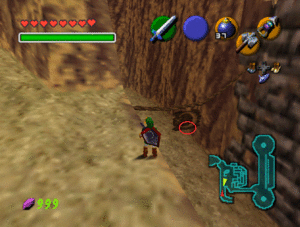 |
Adult | Must be shot with a Hookshot |
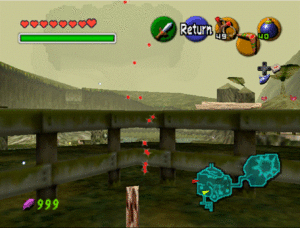
| Horseback Archery Sign | 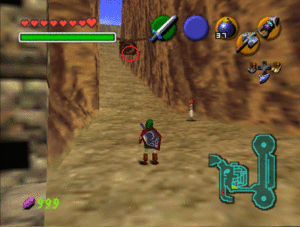 |
Adult | Must be shot with a Hookshot |
Thieves' Hideout: 12 Items
Desert Colossus: 5 Items
Dungeons
Gerudo Training Ground: 3 Items
| Location | Image | Age | Notes |
|---|---|---|---|
| Beamos Room Door | 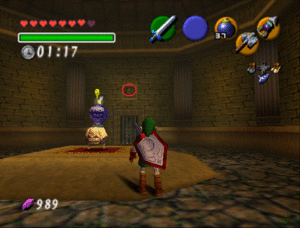 |
Adult | Must be shot with a Bow |
| Torch Slug Room Door | 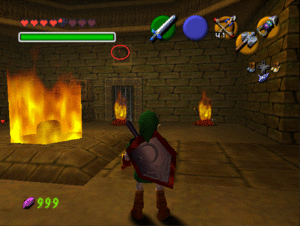 |
Adult | Must be shot with a Bow |
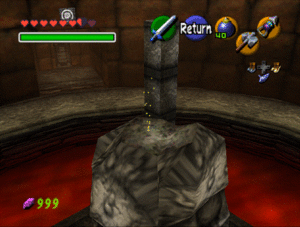
| Top of Eye Statue | 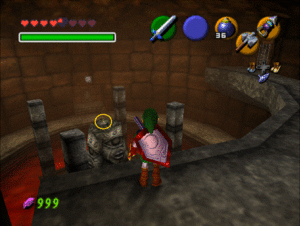 |
Adult | Must have Hover Boots to reach |
Shadow Temple: 1 Item
| Location | Image | Age | Notes |
|---|---|---|---|
| Triple Pot Room Wall | 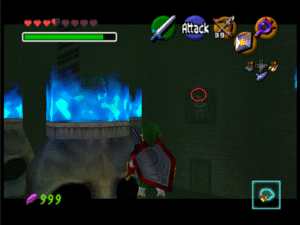 |
Adult | Must be shot with a Bow |
MQ Dungeons
Deku Tree MQ: 4 Items
| Location | Image | Age | Notes |
|---|---|---|---|
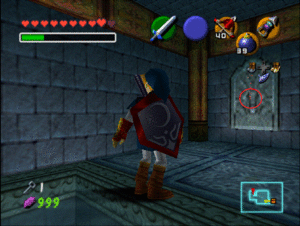
| Basement Graves | 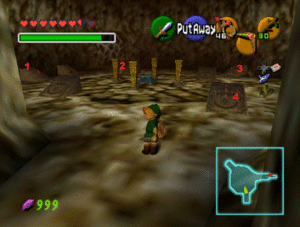 |
Both | Slashed with Sword or Sticks |
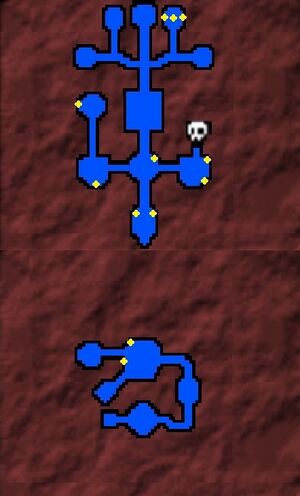
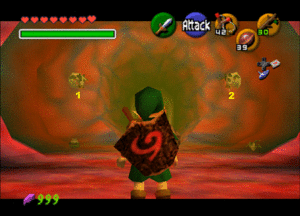
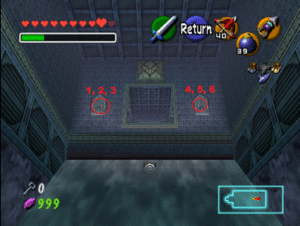
Inside Jabu Jabu's Belly MQ: 23 Items
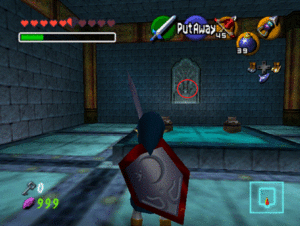
Bottom of the Well MQ: 12 Items
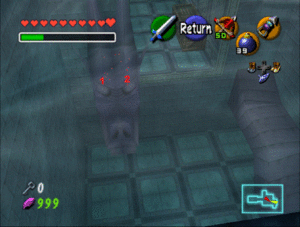
Fire Temple MQ: 14 Items
Water Temple MQ: 22 Items
Shadow Temple MQ: 1 Item
| Location | Image | Age | Notes |
|---|---|---|---|
| Triple Pot Room Wall |  |
Adult | Must be shot with a Bow |
Spirit Temple MQ: 2 Items
| Location | Image | Age | Notes |
|---|---|---|---|
| Chest Switch x2 | 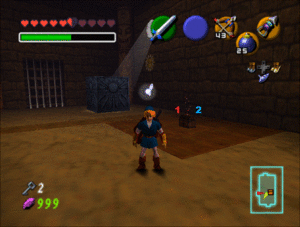 |
Adult | One when slashed with sword, one when bonking with Hammer |
Gerudo Training Ground MQ: 2 Items
| Location | Image | Age | Notes |
|---|---|---|---|
| Dodongo Room Wall | 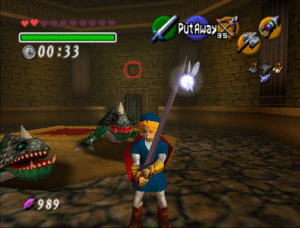 |
Adult | Bow |
| Top of Eye Statue |  |
Adult | Hover Boots |

