m (Some quick edits to a few things.) |
(the usual, probably, idk, this one took a while) |
||
| Line 1: | Line 1: | ||
'''by Raizuto''' | |||
First, install [http://www.retroarch.com/index.php?page=platforms RetroArch] by choosing the download for your operating system. If you are on Windows and running RetroArch causes it to crash immediately, be sure to try the other Windows options available. | |||
{{TOClimit|3}} | |||
== Install a RetroArch Core == | |||
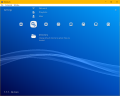
Go to ''Load Core'' on the main menu. [[File:Retroarch-Load-core.png|none|thumb|Load Core]] | |||
'' | Then select ''Download Core...'' | ||
[[File:RA-Download-Core.png|none|thumb|Download Core]] | |||
After the core index list populates, go down until you find ''Nintendo - Nintendo 64 (ParaLLEl N64)'' and install it. If this core gives you issues you can try ''Nintendo - Nintendo 64 (Mupen64Plus - Next)'' however it is likely to crash somewhat frequently. In the future this guide will show how to manually install the old Mupen64Plus core as well which is recommended over trying to use Next. | |||
[[File:Retroarch 01.png|none|thumb|ParaLLEl Core]] | |||
Now that the core is installed you can backspace back out to the main menu. | |||
== Configure RetroArch == | |||
Move over to the ''Settings'' column in the menu. Head down to ''Saving'' and change ''SaveRAM Autosave Interval'' to 10 seconds by selecting it and pressing the right arrow key. | |||
[[File:RA-Saving-Interval.png|none|thumb|RA-Saving-Interval.png]] | |||
Next, go back to the ''Settings'' column and go down to ''Directory'' | |||
< | <gallery> | ||
File:Retroarch 02.png|Directory | |||
File:Retroarch 03.png|Downloads | |||
</gallery> | |||
Select ''Downloads'' with <code>Enter</code>. You will be presented with an overview of your system partitions. | |||
[[File:Retroarch 04.png|none|thumb|Filesystem]] | |||
Navigate through your computer files to the folder you keep your ROMs in. '''They will not show up yet'''. Choose ''Use this directory'' anyway. If you are using the downloaded version of the Ocarina of Time Randomizer the default location for your patched ROMs is a folder called ''Output'' next to the <code>.exe</code> file you double click to start the randomizer. | |||
Once you have finished configuring RetroArch you must properly restart it. ''Do not press <code>Esc</code> or the X in the top right corner.'' Go to the far left column in the menu and move all the way down to the option near the bottom ''Quit Retroarch''. Once you reopen RetroArch you should be able to load your ROMs in the ''Downloads'' section of the ''Load Content'' menu. | |||
[[File:Retroarch 05.png|none|thumb|ROMs under here appear after restarting RetroArch]] | |||
== Controller Configuration == | |||
If your controls don't feel quite right, access the Quick Menu by pressing <code>F1</code> while a ROM is loaded. Go down to ''Options'' and change the deadzone to 10 and analog sensitivity to 80. You may wish to make further personal adjustments as necessary as well. | |||
== HiRes Texture Packs == | |||
Keep in mind texture packs are not allowed to be active for races. [[HiRes Texture Packs]] | |||
== Tips == | == Tips == | ||
*To unbind any button/key hit the delete key on your keyboard in the input settings. | *To unbind any button/key hit the delete key on your keyboard in the input settings. | ||
* | *'''Never''' close RA via it’s top right X, close it from far left Main Menu ''Quit Retroarch''. | ||
*If you want Retroarch to keep running in the background, go over to the | *If you want Retroarch to keep running in the background, go over to the ''Settings'' column in the menu, then down to ''User Interface'', hit enter and set ''Don’t run in the background'' to ''OFF''. | ||
If you happen to try setting custom controller user input binds over using the auto configuration, you might want to know the following info: | |||
*Don't alter the Main Menu bindings for controllers. Open the Quick Menu and change the button mapping there instead. | |||
*Left side user input binds (the <code>Delete</code> key will delete any binding) | |||
**'''B button''' is equivalent to N64 A Button | **'''B button''' is equivalent to N64 A Button | ||
**'''Y button''' is equivalent to N64 B Button | **'''Y button''' is equivalent to N64 B Button | ||
| Line 50: | Line 64: | ||
**'''L1''' is equivalent to N64 L | **'''L1''' is equivalent to N64 L | ||
**'''R1''' is equivalent to N64 R | **'''R1''' is equivalent to N64 R | ||
**''' | **'''Movement:''' | ||
***Left analog X+ = Right | ***Left analog X+ = Right | ||
***Left analog X- = Left | ***Left analog X- = Left | ||
| Line 59: | Line 73: | ||
***Right analog X- = C-Left | ***Right analog X- = C-Left | ||
***Right analog Y+ = C-Down | ***Right analog Y+ = C-Down | ||
***Right analog Y- = C-Up | ***Right analog Y- = C-Up | ||
== Common Issues == | == Common Issues == | ||
*No Audio - Go into the Driver Menu (first thing under the Settings Menu Column) and change the Audio Driver from xaudio to dsound. Then quit RetroArch properly via the Main Menu and restart it. | *No Audio - Go into the Driver Menu (first thing under the Settings Menu Column) and change the Audio Driver from xaudio to dsound. Then quit RetroArch properly via the Main Menu and restart it. | ||
*Retroarch crash when loading ROM - If using the Nintendo - Nintendo 64 (Mupen64Plus) | *Retroarch crash when loading ROM - If using the Nintendo - Nintendo 64 (Mupen64Plus) core, try the Nintendo - Nintendo 64 (ParaLLEl N64) core instead. If using the& Nintendo - Nintendo 64 (ParaLLEl N64) core, try the Nintendo - Nintendo 64 (Mupen64Plus) core instead. | ||
*Boots are equipped / Ocarina pulled out randomly while walking - Go to the input menu and set 'Analog to Digital' to 'None' | *Boots are equipped / Ocarina pulled out randomly while walking - Go to the input menu and set 'Analog to Digital' to 'None' | ||
Revision as of 19:51, 26 September 2019
by Raizuto
First, install RetroArch by choosing the download for your operating system. If you are on Windows and running RetroArch causes it to crash immediately, be sure to try the other Windows options available.
Install a RetroArch Core
Go to Load Core on the main menu.

Then select Download Core...

After the core index list populates, go down until you find Nintendo - Nintendo 64 (ParaLLEl N64) and install it. If this core gives you issues you can try Nintendo - Nintendo 64 (Mupen64Plus - Next) however it is likely to crash somewhat frequently. In the future this guide will show how to manually install the old Mupen64Plus core as well which is recommended over trying to use Next.

Now that the core is installed you can backspace back out to the main menu.
Configure RetroArch
Move over to the Settings column in the menu. Head down to Saving and change SaveRAM Autosave Interval to 10 seconds by selecting it and pressing the right arrow key.

Next, go back to the Settings column and go down to Directory
-
Directory
-
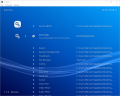
Downloads


Select Downloads with Enter. You will be presented with an overview of your system partitions.

Navigate through your computer files to the folder you keep your ROMs in. They will not show up yet. Choose Use this directory anyway. If you are using the downloaded version of the Ocarina of Time Randomizer the default location for your patched ROMs is a folder called Output next to the .exe file you double click to start the randomizer.
Once you have finished configuring RetroArch you must properly restart it. Do not press Esc or the X in the top right corner. Go to the far left column in the menu and move all the way down to the option near the bottom Quit Retroarch. Once you reopen RetroArch you should be able to load your ROMs in the Downloads section of the Load Content menu.

Controller Configuration
If your controls don't feel quite right, access the Quick Menu by pressing F1 while a ROM is loaded. Go down to Options and change the deadzone to 10 and analog sensitivity to 80. You may wish to make further personal adjustments as necessary as well.
HiRes Texture Packs
Keep in mind texture packs are not allowed to be active for races. HiRes Texture Packs
Tips
- To unbind any button/key hit the delete key on your keyboard in the input settings.
- Never close RA via it’s top right X, close it from far left Main Menu Quit Retroarch.
- If you want Retroarch to keep running in the background, go over to the Settings column in the menu, then down to User Interface, hit enter and set Don’t run in the background to OFF.
If you happen to try setting custom controller user input binds over using the auto configuration, you might want to know the following info:
- Don't alter the Main Menu bindings for controllers. Open the Quick Menu and change the button mapping there instead.
- Left side user input binds (the
Deletekey will delete any binding)- B button is equivalent to N64 A Button
- Y button is equivalent to N64 B Button
- L2 button (trigger) is equivalent to N64 Z Button
- L1 is equivalent to N64 L
- R1 is equivalent to N64 R
- Movement:
- Left analog X+ = Right
- Left analog X- = Left
- Left analog Y+ = Down
- Left analog Y- = Up
- C-Buttons/C-Stick:
- Right analog X+ = C-Right
- Right analog X- = C-Left
- Right analog Y+ = C-Down
- Right analog Y- = C-Up
Common Issues
- No Audio - Go into the Driver Menu (first thing under the Settings Menu Column) and change the Audio Driver from xaudio to dsound. Then quit RetroArch properly via the Main Menu and restart it.
- Retroarch crash when loading ROM - If using the Nintendo - Nintendo 64 (Mupen64Plus) core, try the Nintendo - Nintendo 64 (ParaLLEl N64) core instead. If using the& Nintendo - Nintendo 64 (ParaLLEl N64) core, try the Nintendo - Nintendo 64 (Mupen64Plus) core instead.
- Boots are equipped / Ocarina pulled out randomly while walking - Go to the input menu and set 'Analog to Digital' to 'None'