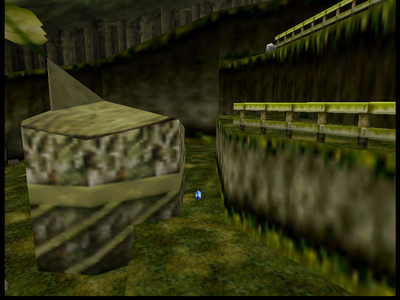
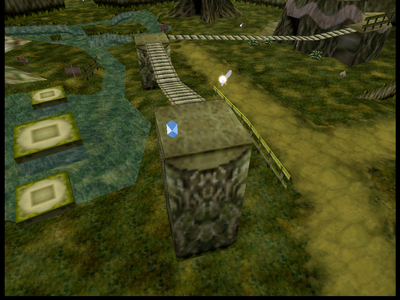
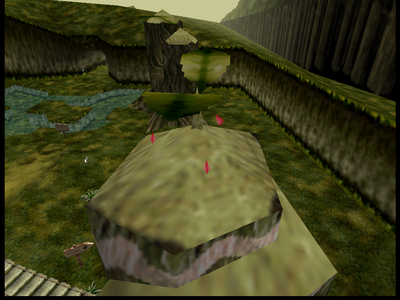
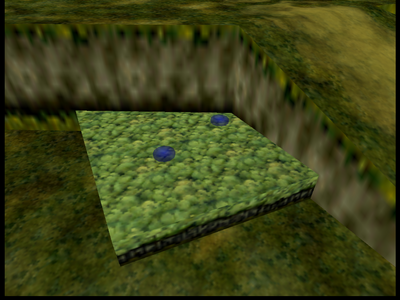
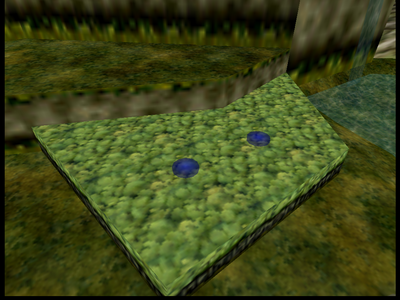
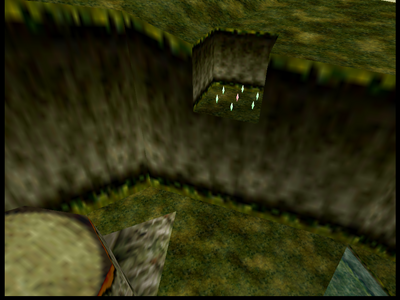
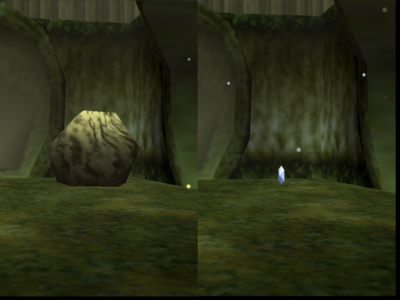
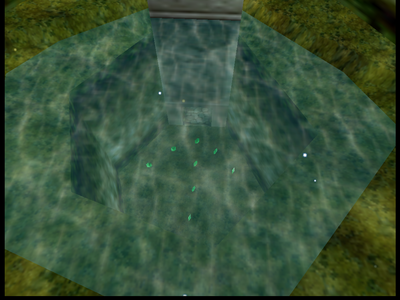
Kokiri Forest
KF Sarias House
| Location | Image | Logic Notes |
|---|---|---|
| KF Sarias Recovery Heart 1 KF Sarias Recovery Heart 2 KF Sarias Recovery Heart 3 KF Sarias Recovery Heart 4 |
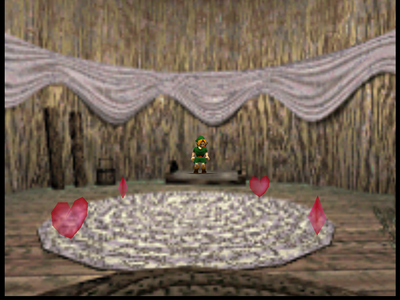 |
True |
KF Kokiri Shop
| Location | Image | Logic Notes |
|---|---|---|
| KF Shop Invisible Rupee | IMAGE_URL_HERE | True |
LW Beyond Mido
Lake Hylia
| Location | Image | Logic Notes |
|---|---|---|
| LH Underwater Rupee 1 | IMAGE_URL_HERE | is_child |
| LH Underwater Rupee 2 | IMAGE_URL_HERE | is_child and can_dive |
| LH Underwater Rupee 3 | IMAGE_URL_HERE | is_child and can_dive |
LH Lab
| Location | Image | Logic Notes |
|---|---|---|
| LH Lab Dive Rupee 1 LH Lab Dive Rupee 2 LH Lab Dive Rupee 3 |
IMAGE_URL_HERE | (Progressive_Scale, 2) or can_use(Iron_Boots) |
Graveyard Dampes Grave
| Location | Image | Logic Notes |
|---|---|---|
| Graveyard Dampe Race Rupee 1 Graveyard Dampe Race Rupee 2 Graveyard Dampe Race Rupee 3 Graveyard Dampe Race Rupee 4 Graveyard Dampe Race Rupee 5 Graveyard Dampe Race Rupee 6 Graveyard Dampe Race Rupee 7 Graveyard Dampe Race Rupee 8 |
IMAGE_URL_HERE | True |
Death Mountain
| Location | Image | Logic Notes |
|---|---|---|
| DMT Rock Red Rupee | IMAGE_URL_HERE | The rupee can only be obtained as child. However this boulder can be broken as adult and will remain broken as child, so it is possible for logic to require breaking this with hammer and coming back as child. (here(is_child) and has_explosives) or (here(is_child) and (here(is_adult) and can_use(Megaton_Hammer))) |
| DMT Rock Blue Rupee | IMAGE_URL_HERE | here(is_child) and has_explosives |
Goron City
| Location | Image | Logic Notes |
|---|---|---|
| GC Spinning Pot Bomb Drop 1 GC Spinning Pot Bomb Drop 2 GC Spinning Pot Bomb Drop 3 |
IMAGE_URL_HERE | is_child and 'Goron City Child Fire' and (Bombs or (Progressive_Strength_Upgrade and logic_goron_city_pot_with_strength) or (has_bombchus and logic_goron_city_pot)) |
| GC Spinning Pot Rupee Drop 1 GC Spinning Pot Rupee Drop 2 GC Spinning Pot Rupee Drop 3 |
IMAGE_URL_HERE | is_child and 'Goron City Child Fire' and (Bombs or (Progressive_Strength_Upgrade and logic_goron_city_pot_with_strength) or (has_bombchus and logic_goron_city_pot)) |
| GC Spinning Pot PoH Drop Rupee 1 GC Spinning Pot PoH Drop Rupee 2 |
IMAGE_URL_HERE | is_child and 'Goron City Child Fire' and (Bombs or (Progressive_Strength_Upgrade and logic_goron_city_pot_with_strength) or (has_bombchus and logic_goron_city_pot)) |
DMC Pierre Platform
| Location | Image | Logic Notes |
|---|---|---|
| DMC Pierre Rupee Circle Green Rupee 1 DMC Pierre Rupee Circle Green Rupee 2 DMC Pierre Rupee Circle Green Rupee 3 DMC Pierre Rupee Circle Green Rupee 4 DMC Pierre Rupee Circle Green Rupee 5 DMC Pierre Rupee Circle Green Rupee 6 DMC Pierre Rupee Circle Red Rupee |
IMAGE_URL_HERE | here(is_adult) |
DMC Central Nearby
| Location | Image | Logic Notes |
|---|---|---|
| DMC Lower Red Rupee 1 DMC Lower Red Rupee 2 DMC Lower Blue Rupee 1 DMC Lower Blue Rupee 2 DMC Lower Blue Rupee 3 DMC Lower Blue Rupee 4 DMC Lower Blue Rupee 5 DMC Lower Blue Rupee 6 |
IMAGE_URL_HERE | here(is_child) |
Zora River
| Location | Image | Logic Notes |
|---|---|---|
| ZR Waterfall Rupee 1 ZR Waterfall Rupee 2 ZR Waterfall Rupee 3 ZR Waterfall Rupee 4 |
IMAGE_URL_HERE | is_adult |
Zoras Fountain
| Location | Image | Logic Notes |
|---|---|---|
| ZF Bottom Freestanding Rupee 1-18 | IMAGE_URL_HERE | is_adult and Iron_Boots and (logic_fewer_tunic_requirements or can_use(Zora_Tunic)) |
DMT Cow Grotto
| Location | Image | Logic Notes |
|---|---|---|
| DMT Cow Grotto Rupee Circle Green Rupee 1 | IMAGE_URL_HERE | True |
| DMT Cow Grotto Rupee Circle Green Rupee 2 | IMAGE_URL_HERE | True |
| DMT Cow Grotto Rupee Circle Green Rupee 3 | IMAGE_URL_HERE | True |
| DMT Cow Grotto Rupee Circle Green Rupee 4 | IMAGE_URL_HERE | True |
| DMT Cow Grotto Rupee Circle Green Rupee 5 | IMAGE_URL_HERE | True |
| DMT Cow Grotto Rupee Circle Green Rupee 6 | IMAGE_URL_HERE | True |
| DMT Cow Grotto Rupee Circle Red Rupee | IMAGE_URL_HERE | True |
| DMT Cow Grotto Recovery Heart 1 | IMAGE_URL_HERE | True |
| DMT Cow Grotto Recovery Heart 2 | IMAGE_URL_HERE | True |
| DMT Cow Grotto Recovery Heart 3 | IMAGE_URL_HERE | True |
| DMT Cow Grotto Recovery Heart 4 | IMAGE_URL_HERE | True |
GV Octorok Grotto
| Location | Image | Logic Notes |
|---|---|---|
| GV Octorok Grotto Red Rupee GV Octorok Grotto Blue Rupee 1 GV Octorok Grotto Blue Rupee 2 GV Octorok Grotto Blue Rupee 3 GV Octorok Grotto Green Rupee 1 GV Octorok Grotto Green Rupee 2 GV Octorok Grotto Green Rupee 3 GV Octorok Grotto Green Rupee 4 |
IMAGE_URL_HERE | True |
Deku Tree Lobby
| Location | Image | Logic Notes |
|---|---|---|
| Deku Tree Walk the Plank Recovery Heart | IMAGE_URL_HERE | True |
| Deku Tree Leap Recovery Heart | IMAGE_URL_HERE | is_adult or can_child_attack or Nuts |
Deku Tree Boss Room
| Location | Image | Logic Notes |
|---|---|---|
| Deku Tree 2-3-1 Scrubs Recovery Heart 1 | IMAGE_URL_HERE | True |
| Deku Tree 2-3-1 Scrubs Recovery Heart 2 | IMAGE_URL_HERE | True |
| Deku Tree 2-3-1 Scrubs Recovery Heart 3 | IMAGE_URL_HERE | True |
Dodongos Cavern Lobby
| Location | Image | Logic Notes |
|---|---|---|
| Dodongos Cavern Lizalfos Hidden Recovery Heart | IMAGE_URL_HERE | here(can_blast_or_smash or Progressive_Strength_Upgrade) or is_adult |
Dodongos Cavern Climb
| Location | Image | Logic Notes |
|---|---|---|
| Dodongos Cavern Lizalfos Recovery Heart 1 | IMAGE_URL_HERE | True |
| Dodongos Cavern Lizalfos Recovery Heart 2 | IMAGE_URL_HERE | True |
| Dodongos Cavern Behind Block Recovery Heart | IMAGE_URL_HERE | True |
Forest Temple Well
| Location | Image | Logic Notes |
|---|---|---|
| Forest Temple Well Recovery Heart 1 | IMAGE_URL_HERE | True |
| Forest Temple Well Recovery Heart 2 | IMAGE_URL_HERE | True |
Forest Temple Outside Upper Ledge
| Location | Image | Logic Notes |
|---|---|---|
| Forest Temple Courtyard Recovery Heart 1 | IMAGE_URL_HERE | True |
| Forest Temple Courtyard Recovery Heart 2 | IMAGE_URL_HERE | True |
Fire Temple Big Lava Room
| Location | Image | Logic Notes |
|---|---|---|
| Fire Temple Elevator Room Recovery Heart 1 | IMAGE_URL_HERE | (Small_Key_Fire_Temple, 3) |
| Fire Temple Elevator Room Recovery Heart 2 | IMAGE_URL_HERE | (Small_Key_Fire_Temple, 3) |
| Fire Temple Elevator Room Recovery Heart 3 | IMAGE_URL_HERE | (Small_Key_Fire_Temple, 3) |
Fire Temple Middle
| Location | Image | Logic Notes |
|---|---|---|
| Fire Temple Eye Switch Room Recovery Heart 1 | IMAGE_URL_HERE | (Small_Key_Fire_Temple, 5) |
| Fire Temple Eye Switch Room Recovery Heart 2 | IMAGE_URL_HERE | (Small_Key_Fire_Temple, 5) |
| Fire Temple Eye Switch Room Recovery Heart 3 | IMAGE_URL_HERE | (Small_Key_Fire_Temple, 5) |
| Fire Temple Moving Fire Room Recovery Heart 1 | IMAGE_URL_HERE | (Small_Key_Fire_Temple, 6) |
| Fire Temple Moving Fire Room Recovery Heart 2 | IMAGE_URL_HERE | (Small_Key_Fire_Temple, 6) |
| Fire Temple Moving Fire Room Recovery Heart 3 | IMAGE_URL_HERE | (Small_Key_Fire_Temple, 6) |
Water Temple Dark Link Region
| Location | Image | Logic Notes |
|---|---|---|
| Water Temple River Recovery Heart 1 | IMAGE_URL_HERE | can_play(Song_of_Time) |
| Water Temple River Recovery Heart 2 | IMAGE_URL_HERE | can_play(Song_of_Time) |
| Water Temple River Recovery Heart 3 | IMAGE_URL_HERE | can_play(Song_of_Time) |
| Water Temple River Recovery Heart 4 | IMAGE_URL_HERE | can_play(Song_of_Time) |
Shadow Temple Huge Pit
| Location | Image | Logic Notes |
|---|---|---|
| Shadow Temple Invisible Blades Recovery Heart 1 | IMAGE_URL_HERE | can_play(Song_of_Time) |
| Shadow Temple Invisible Blades Recovery Heart 2 | IMAGE_URL_HERE | can_play(Song_of_Time) |
Shadow Temple Boat
| Location | Image | Logic Notes |
|---|---|---|
| Shadow Temple Before Boat Freestanding Recovery Heart 1 Shadow Temple Before Boat Freestanding Recovery Heart 2 |
IMAGE_URL_HERE | There are 2 recovery hearts on the platform above the boat by the Gold Skulltula that can be reached with scarecrow song and Longshot. |
Shadow Temple Beyond Boat
| Location | Image | Logic Notes |
|---|---|---|
| Shadow Temple After Boat Freestanding Recovery Heart Upper 1 Shadow Temple After Boat Freestanding Recovery Heart Upper 2 |
IMAGE_URL_HERE | The two upper recovery hearts can be reached with scarecrow's song and Longshot. The upper platform can be reached from the center section of the room without dropping the statue. |
| Shadow Temple After Boat Freestanding Recovery Heart Lower | IMAGE_URL_HERE | The lower platform can be reached by either using scarecrow's song and Longshot to the upper platform and then jumping down, or by crossing across the statue and playing Song of Time in front of the platform. |
| Shadow Temple 3 Spinning Pots Rupee 1 | IMAGE_URL_HERE | Bomb_Bag or Progressive_Strength_Upgrade |
| Shadow Temple 3 Spinning Pots Rupee 2 | IMAGE_URL_HERE | Bomb_Bag or Progressive_Strength_Upgrade |
| Shadow Temple 3 Spinning Pots Rupee 3 | IMAGE_URL_HERE | Bomb_Bag or Progressive_Strength_Upgrade |
| Shadow Temple 3 Spinning Pots Rupee 4 | IMAGE_URL_HERE | Bomb_Bag or Progressive_Strength_Upgrade |
| Shadow Temple 3 Spinning Pots Rupee 5 | IMAGE_URL_HERE | Bomb_Bag or Progressive_Strength_Upgrade |
| Shadow Temple 3 Spinning Pots Rupee 6 | IMAGE_URL_HERE | Bomb_Bag or Progressive_Strength_Upgrade |
| Shadow Temple 3 Spinning Pots Rupee 7 | IMAGE_URL_HERE | Bomb_Bag or Progressive_Strength_Upgrade |
| Shadow Temple 3 Spinning Pots Rupee 8 | IMAGE_URL_HERE | Bomb_Bag or Progressive_Strength_Upgrade |
| Shadow Temple 3 Spinning Pots Rupee 9 | IMAGE_URL_HERE | Bomb_Bag or Progressive_Strength_Upgrade |
Spirit Temple Beyond Final Locked Door
| Location | Image | Logic Notes |
|---|---|---|
| Spirit Temple Shifting Wall Recovery Heart 1 | IMAGE_URL_HERE | Progressive_Hookshot |
| Spirit Temple Shifting Wall Recovery Heart 2 | IMAGE_URL_HERE | Progressive_Hookshot |
Ganons Castle Fire Trial
| Location | Image | Logic Notes |
|---|---|---|
| Ganons Castle Fire Trial Recovery Heart | IMAGE_URL_HERE | True |
Ganons Castle Shadow Trial
| Location | Image | Logic Notes |
|---|---|---|
| Ganons Castle Shadow Trial Recovery Heart 1 | IMAGE_URL_HERE | can_use(Lens_of_Truth) and ( can_use(Fire_Arrows) or (can_use(Longshot) and (Hover_Boots or can_use(Dins_Fire)))) |
| Ganons Castle Shadow Trial Recovery Heart 2 | IMAGE_URL_HERE | can_use(Lens_of_Truth) and ( can_use(Fire_Arrows) or (can_use(Longshot) and (Hover_Boots or can_use(Dins_Fire)))) |
| Ganons Castle Shadow Trial Recovery Heart 3 | IMAGE_URL_HERE | can_use(Lens_of_Truth) and ( can_use(Fire_Arrows) or (can_use(Longshot) and (Hover_Boots or can_use(Dins_Fire)))) |
Ganons Castle Spirit Trial
| Location | Image | Logic Notes |
|---|---|---|
| Ganons Castle Spirit Trial Recovery Heart | IMAGE_URL_HERE | True |
Bottom of the Well Main Area
| Location | Image | Logic Notes |
|---|---|---|
| Bottom of the Well Coffin Recovery Heart 1 | IMAGE_URL_HERE | Sticks or can_use(Dins_Fire) |
| Bottom of the Well Coffin Recovery Heart 2 | IMAGE_URL_HERE | True |
| Bottom of the Well Center Room Pit Fall Rupee 1 | IMAGE_URL_HERE | logic_lens_botw or can_use(Lens_of_Truth) |
| Bottom of the Well Center Room Pit Fall Rupee 2 | IMAGE_URL_HERE | logic_lens_botw or can_use(Lens_of_Truth) |
| Bottom of the Well Center Room Pit Fall Rupee 3 | IMAGE_URL_HERE | logic_lens_botw or can_use(Lens_of_Truth) |
| Bottom of the Well Center Room Pit Fall Rupee 4 | IMAGE_URL_HERE | logic_lens_botw or can_use(Lens_of_Truth) |
| Bottom of the Well Center Room Pit Fall Rupee 5 | IMAGE_URL_HERE | logic_lens_botw or can_use(Lens_of_Truth) |
Gerudo Training Ground Lobby
| Location | Image | Logic Notes |
|---|---|---|
| Gerudo Training Ground Beamos Recovery Heart 1 | IMAGE_URL_HERE | True |
| Gerudo Training Ground Beamos Recovery Heart 2 | IMAGE_URL_HERE | True |
Ice Cavern
| Location | Image | Logic Notes |
|---|---|---|
| Ice Cavern Freestanding Blue Rupee | IMAGE_URL_HERE | Blue_Fire |
| Ice Cavern Map Room Recovery Heart 1 Ice Cavern Map Room Recovery Heart 2 Ice Cavern Map Room Recovery Heart 3 |
IMAGE_URL_HERE | is_adult |
| Ice Cavern Block Room Red Rupee 1 Ice Cavern Block Room Red Rupee 2 Ice Cavern Block Room Red Rupee 3 |
IMAGE_URL_HERE | (is_adult and can_play(Song_of_Time)) or (is_child and can_use(Boomerang)) |
