(Update images to jpg.) |
|||
| (93 intermediate revisions by 2 users not shown) | |||
| Line 1: | Line 1: | ||
== Kokiri Forest == | == Kokiri Forest == | ||
{| border="0" cellpadding="1" cellspacing="1" | {| border="0" cellpadding="1" cellspacing="1" width=100% | ||
!width="40%"|Location!!width="30%"|Image!!Logic Notes | !width="40%"|Location!!width="30%"|Image!!style="text-align:center"|Logic Notes | ||
|- | |- | ||
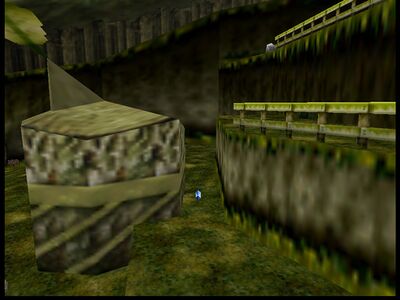
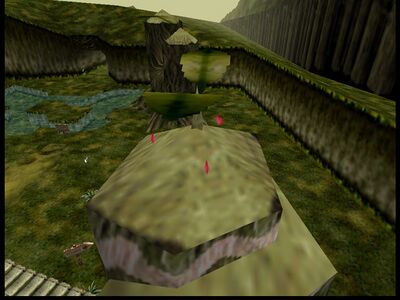
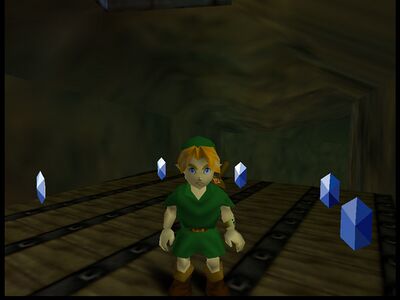
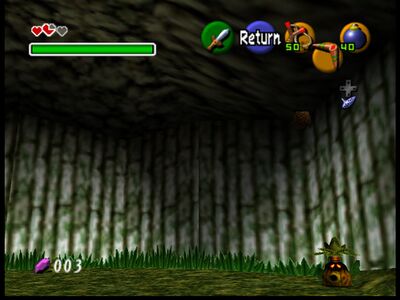
|| KF Behind Midos Blue Rupee || | || KF Behind Midos Blue Rupee || [[File:Fs kf behind midos blue rupee.jpg|400px]] ||style="text-align:center"|Child only | ||
|- | |- | ||
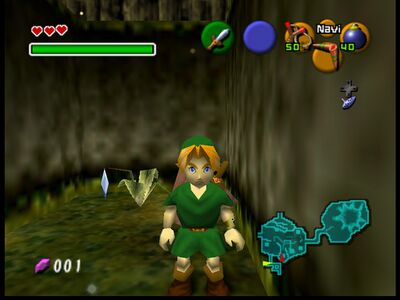
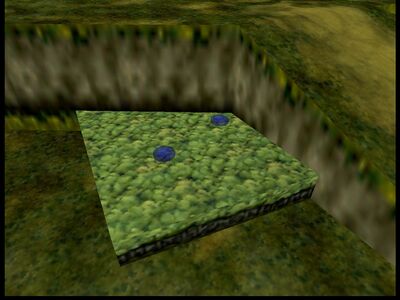
|| KF Boulder Maze Blue Rupee 1 || | || KF Boulder Maze Blue Rupee 1 || [[File:Kf maze rupee1.jpg|400px]]||style="text-align:center"|Child only | ||
|- | |- | ||
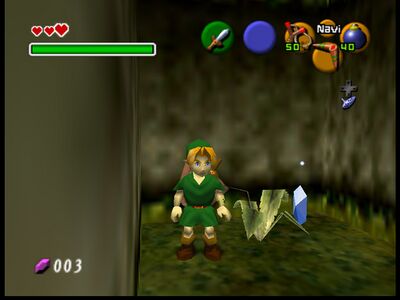
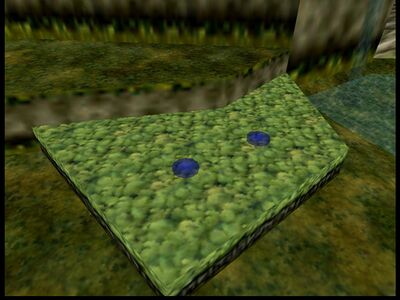
|| KF Boulder Maze Blue Rupee 2 || | || KF Boulder Maze Blue Rupee 2 || [[File:Kf maze rupee2.jpg|400px]]||style="text-align:center"|Child only | ||
|- | |- | ||
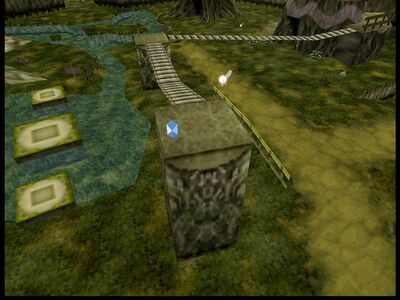
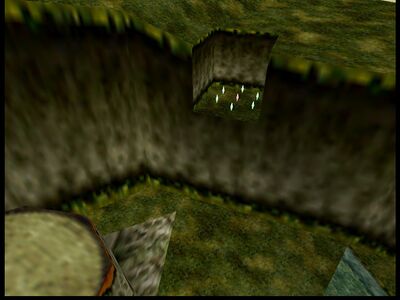
|| KF End of Bridge Blue Rupee || | || KF End of Bridge Blue Rupee || [[File:Fs kf end of bridge blue rupee.jpg|400px]] ||style="text-align:center"|Child only | ||
|- | |- | ||
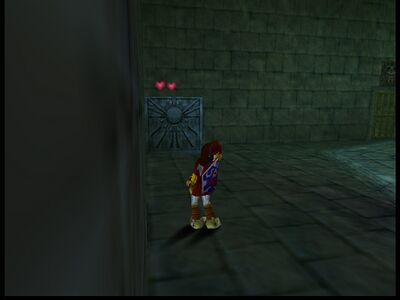
|| KF Top of Sarias Recovery Heart 1 || | || KF Top of Sarias Recovery Heart 1</br>KF Top of Sarias Recovery Heart 2</br>KF Top of Sarias Recovery Heart 3 || [[File:Fs kf top of sarias recovery heart.jpg|400px]]||style="text-align:center"|Child only | ||
|- | |- | ||
|| KF | || KF Near Ramp Green Rupee 1</br>KF Near Ramp Green Rupee 2 || [[File:Fs kf near ramp green rupees.jpg|400px]]||style="text-align:center"|Child only. Unlike other rupees hidden in the grass, these rupees are not invisible. | ||
|- | |- | ||
|| KF | || KF Near Midos Green Rupee 1</br> KF Near Midos Green Rupee 2 || [[File:Fs kf near midos green rupees.jpg|400px]] ||style="text-align:center"|Child only. Unlike other rupees hidden in the grass, these rupees are not invisible. | ||
|- | |- | ||
|| KF Bean Platform Rupee Circle Green Rupee 1</br>KF Bean Platform Rupee Circle Green Rupee 2</br>KF Bean Platform Rupee Circle Green Rupee 3</br>KF Bean Platform Rupee Circle Green Rupee 4</br>KF Bean Platform Rupee Circle Green Rupee 5</br>KF Bean Platform Rupee Circle Green Rupee 6</br>KF Bean Platform Rupee Circle Red Rupee || [[File:Fs kf bean platform rupee circle.jpg|400px]]||style="text-align:center"|The rupees above Kokiri shop can be reached using the magic bean platform, or hover boots" | |||
|| KF Bean Platform Rupee Circle Green Rupee 1 | |||
|- | |- | ||
|} | |} | ||
== KF Sarias House == | == KF Sarias House == | ||
{| border="0" cellpadding="1" cellspacing="1" | {| border="0" cellpadding="1" cellspacing="1" width=100% | ||
!width="40%"|Location!!width="30%"|Image!!Logic Notes | !width="40%"|Location!!width="30%"|Image!!style="text-align:center"|Logic Notes | ||
|- | |- | ||
|| KF Sarias Recovery Heart 4 || | || KF Sarias Recovery Heart 1</br>KF Sarias Recovery Heart 2</br>KF Sarias Recovery Heart 3</br>KF Sarias Recovery Heart 4 || [[File:Fs kf sarias house recovery hearts.jpg|400px]] ||style="text-align:center"|True | ||
|- | |- | ||
|} | |} | ||
== KF Kokiri Shop == | == KF Kokiri Shop == | ||
{| border="0" cellpadding="1" cellspacing="1" | {| border="0" cellpadding="1" cellspacing="1" width=100% | ||
!width="40%"|Location!!width="30%"|Image!!Logic Notes | !width="40%"|Location!!width="30%"|Image!!style="text-align:center"|Logic Notes | ||
|- | |- | ||
|| KF Shop Invisible Rupee || | || KF Shop Invisible Rupee || [[File:Kf shop invisible rupee.jpg|400px]]||style="text-align:center"|True | ||
|- | |- | ||
|} | |} | ||
== LW Beyond Mido == | == LW Beyond Mido == | ||
{| border="0" cellpadding="1" cellspacing="1" | {| border="0" cellpadding="1" cellspacing="1" width=100% | ||
!width="40%"|Location!!width="30%"|Image!!Logic Notes | !width="40%"|Location!!width="30%"|Image!!style="text-align:center"|Logic Notes | ||
|- | |- | ||
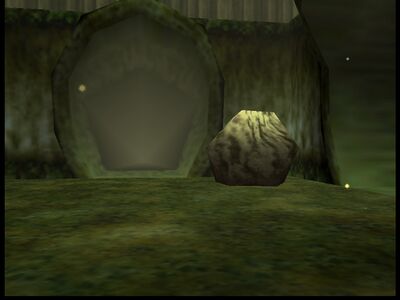
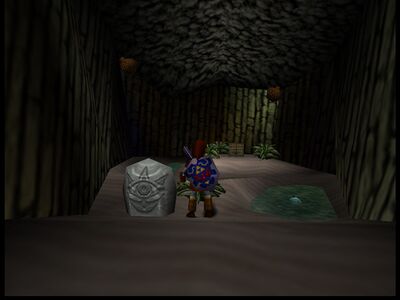
|| LW Under Boulder Rupee || | || LW Under Boulder Rupee || [[File:Fs lw under boulder rupee 1.jpg|400px]] ||style="text-align:center"|In the second to last section of the Lost Woods before Sacred Forest Meadow, there is a boulder with a rupee inside. | ||
|- | |- | ||
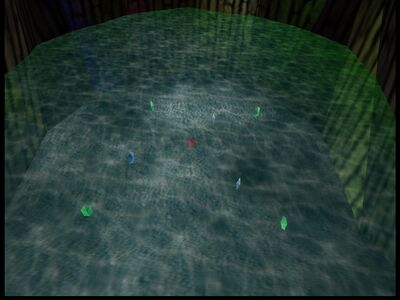
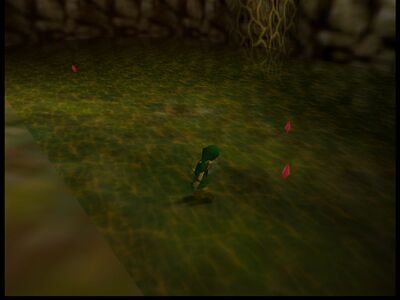
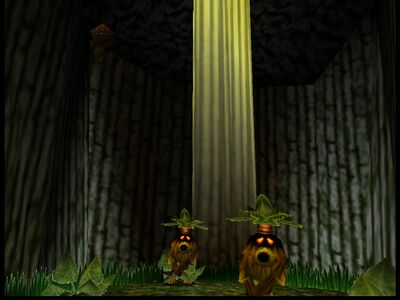
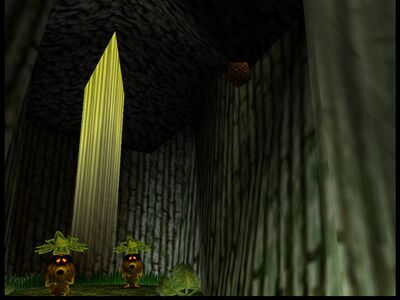
|| LW Water Rupee 1 | || LW Water Rupee 1</br>LW Water Rupee 2</br>LW Water Rupee 3</br>LW Water Rupee 4</br>LW Water Rupee 5</br>LW Water Rupee 6</br>LW Water Rupee 7</br>LW Water Rupee 8 || [[File:Fs lw water rupees.jpg|400px]] ||style="text-align:center"|Child Only. The 8 rupees in the Lost Woods shortcut to Zora's River can be reached with Silver Scale or fished out with a boomerang. | ||
|- | |||
|- | |- | ||
|} | |} | ||
== Lake Hylia == | == Lake Hylia == | ||
{| border="0" cellpadding="1" cellspacing="1" | {| border="0" cellpadding="1" cellspacing="1" width=100% | ||
!width="40%"|Location!!width="30%"|Image!!Logic Notes | !width="40%"|Location!!width="30%"|Image!!style="text-align:center"|Logic Notes | ||
|- | |- | ||
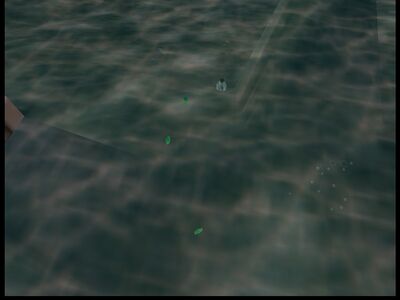
|| LH Underwater Rupee 3 || | || LH Underwater Rupee 1</br>LH Underwater Rupee 2</br>LH Underwater Rupee 3 || [[File:Lh underwater rupee.jpg|400px]]||style="text-align:center"|Child only. The first rupee (closest to the entrance to Zora's Domain) can be reached without any scale. The other 2 require Silver Scale. | ||
|- | |- | ||
|} | |} | ||
== LH Lab == | == LH Lab == | ||
{| border="0" cellpadding="1" cellspacing="1" | {| border="0" cellpadding="1" cellspacing="1" width=100% | ||
!width="40%"|Location!!width="30%"|Image!!Logic Notes | !width="40%"|Location!!width="30%"|Image!!style="text-align:center"|Logic Notes | ||
|- | |- | ||
|| LH Lab Dive Rupee 3 || | || LH Lab Dive Rupee 1</br>LH Lab Dive Rupee 2</br>LH Lab Dive Rupee 3 || [[File:Lh lab dive rupee.jpg|400px]]||style="text-align:center"|The 3 red rupees at the bottom of the lab can be reached with Gold Scale or Iron Boots (adult) | ||
|- | |- | ||
|} | |} | ||
== Graveyard Dampes Grave == | == Graveyard Dampes Grave == | ||
{| border="0" cellpadding="1" cellspacing="1" | {| border="0" cellpadding="1" cellspacing="1" width=100% | ||
!width="40%"|Location!!width="30%"|Image!!Logic Notes | !width="40%"|Location!!width="30%"|Image!!style="text-align:center"|Logic Notes | ||
|- | |- | ||
|| Graveyard Dampe Race Rupee 5 | || Graveyard Dampe Race Rupee 1</br>Graveyard Dampe Race Rupee 2</br>Graveyard Dampe Race Rupee 3</br>Graveyard Dampe Race Rupee 4</br>Graveyard Dampe Race Rupee 5</br>Graveyard Dampe Race Rupee 6</br>Graveyard Dampe Race Rupee 7</br>Graveyard Dampe Race Rupee 8 || [[File:Graveyard_dampe_race_rupees.jpg|400px]]||style="text-align:center"|There are 8 freestanding rupees in Dampe's race, locations are noted on the map. | ||
|- | |- | ||
|} | |} | ||
== Death Mountain == | == Death Mountain == | ||
{| border="0" cellpadding="1" cellspacing="1" | {| border="0" cellpadding="1" cellspacing="1" width=100% | ||
!width="40%"|Location!!width="30%"|Image!!Logic Notes | !width="40%"|Location!!width="30%"|Image!!style="text-align:center"|Logic Notes | ||
|- | |- | ||
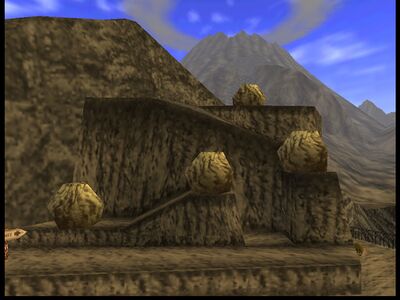
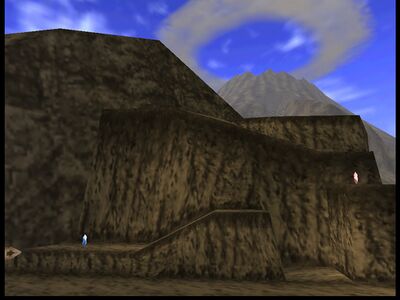
|| DMT Rock Red Rupee || | || DMT Rock Red Rupee</br>DMT Rock Blue Rupee ||[[File:Dmt rock rupees.jpg|400px]]</br>[[File:Dmt rock rupees broken.jpg|400px]]||style="text-align:center"|The rupees can only be obtained as child. However the upper boulder can be broken as adult and will remain broken as child, so it is possible for logic to require breaking this with hammer and coming back as child.</br>(here(is_child) and has_explosives) or (here(is_child) and (here(is_adult) and can_use(Megaton_Hammer))) | ||
|- | |- | ||
|} | |} | ||
== Goron City == | == Goron City == | ||
{| border="0" cellpadding="1" cellspacing="1" | {| border="0" cellpadding="1" cellspacing="1" width=100% | ||
!width="40%"|Location!!width="30%"|Image!!Logic Notes | !width="40%"|Location!!width="30%"|Image!!style="text-align:center"|Logic Notes | ||
|- | |- | ||
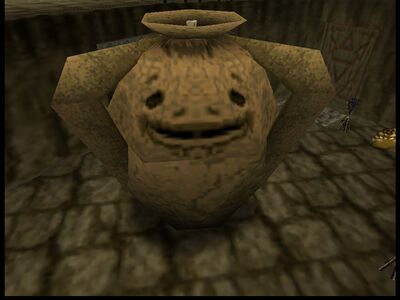
|| GC Spinning Pot Bomb Drop 2 | || GC Spinning Pot Bomb Drop 1</br>GC Spinning Pot Bomb Drop 2</br>GC Spinning Pot Bomb Drop 3</br>GC Spinning Pot Rupee Drop 1</br>GC Spinning Pot Rupee Drop 2</br>GC Spinning Pot Rupee Drop 3</br>GC Spinning Pot PoH Drop Rupee 1</br>GC Spinning Pot PoH Drop Rupee 2 || [[File:Gc spinning pot.jpg|400px]]||style="text-align:center"| is_child and 'Goron City Child Fire' and (Bombs or (Progressive_Strength_Upgrade and logic_goron_city_pot_with_strength) or (has_bombchus and logic_goron_city_pot)) | ||
|- | |- | ||
|} | |} | ||
== DMC Pierre Platform == | == DMC Pierre Platform == | ||
{| border="0" cellpadding="1" cellspacing="1" | {| border="0" cellpadding="1" cellspacing="1" width=100% | ||
!width="40%"|Location!!width="30%"|Image!!Logic Notes | !width="40%"|Location!!width="30%"|Image!!style="text-align:center"|Logic Notes | ||
|- | |- | ||
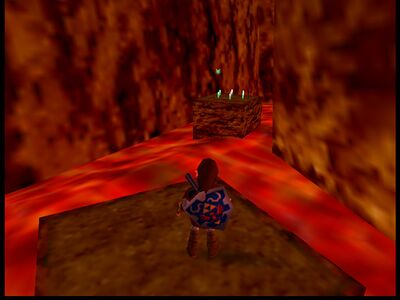
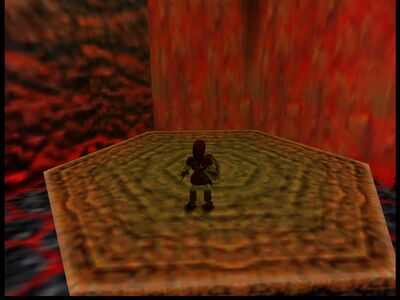
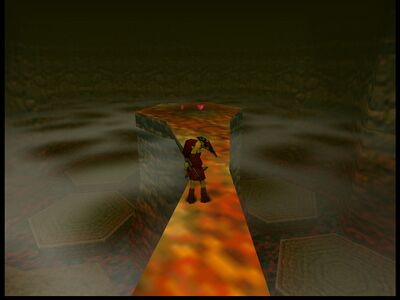
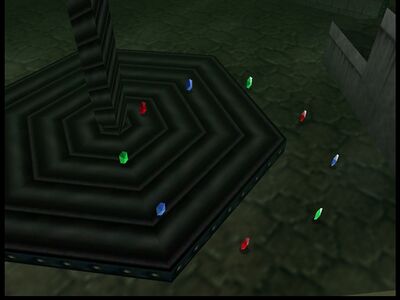
|| DMC Pierre Rupee Circle Green Rupee 2 | || DMC Pierre Rupee Circle Green Rupee 1</br>DMC Pierre Rupee Circle Green Rupee 2</br>DMC Pierre Rupee Circle Green Rupee 3</br>DMC Pierre Rupee Circle Green Rupee 4</br>DMC Pierre Rupee Circle Green Rupee 5</br>DMC Pierre Rupee Circle Green Rupee 6</br>DMC Pierre Rupee Circle Red Rupee || [[File:Dmc pierre rupee circle.jpg|400px]] ||style="text-align:center"|Adult only. The platform can be reached by jumping down from the top of DMC without any items. From the lower end of DMC, you can reach the platform with scarecrow's song and Longshot. | ||
|- | |- | ||
|} | |} | ||
== DMC Central Nearby == | == DMC Central Nearby == | ||
{| border="0" cellpadding="1" cellspacing="1" | {| border="0" cellpadding="1" cellspacing="1" width=100% | ||
!width="40%"|Location!!width="30%"|Image!!Logic Notes | !width="40%"|Location!!width="30%"|Image!!style="text-align:center"|Logic Notes | ||
|- | |- | ||
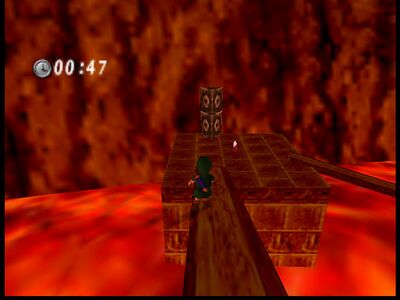
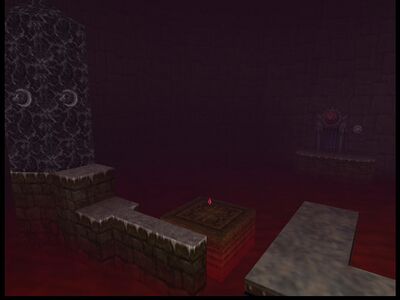
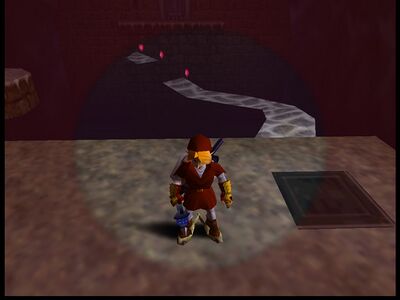
|| DMC Lower Red Rupee 1 || | || DMC Lower Red Rupee 1</br>DMC Lower Red Rupee 2</br>DMC Lower Blue Rupee 1</br>DMC Lower Blue Rupee 2</br>DMC Lower Blue Rupee 3</br>DMC Lower Blue Rupee 4</br>DMC Lower Blue Rupee 5</br>DMC Lower Blue Rupee 6 || [[File:Dmc lower red rupee.jpg|400px]] </br> [[File:Dmc lower rupees.jpg|400px]] ||style="text-align:center"|Child only. Requires access to the lower section of DMC as child (i.e. Bolero). | ||
|- | |- | ||
|| | |} | ||
== Zora River == | |||
{| border="0" cellpadding="1" cellspacing="1" width=100% | |||
!width="40%"|Location!!width="30%"|Image!!style="text-align:center"|Logic Notes | |||
|- | |- | ||
|| | || ZR Waterfall Rupee 1</br>ZR Waterfall Rupee 2</br>ZR Waterfall Rupee 3</br>ZR Waterfall Rupee 4 || [[File:Zr waterfall rupee.jpg|400px]] ||style="text-align:center"|Adult only. There are 4 red rupees below the waterfall. They can be reached without iron boots by jumping down from the topmost platform. | ||
|- | |- | ||
| | |} | ||
== Zoras Domain == | |||
| | {| border="0" cellpadding="1" cellspacing="1" width=100% | ||
|| | !width="40%"|Location!!width="30%"|Image!!style="text-align:center"|Logic Notes | ||
|- | |- | ||
|| | || ZD In Front of King Zora Beehive 1 || [[File:Zd front of king zora beehive1.jpg|400px]]||style="text-align:center"|is_child and can_break_beehive | ||
|- | |- | ||
|| | || ZD In Front of King Zora Beehive 2 || [[File:Zd front of king zora beehive2.jpg|400px]]||style="text-align:center"|is_child and can_break_beehive | ||
|- | |- | ||
|} | |} | ||
== Zora | == ZD Behind King Zora == | ||
{| border="0" cellpadding="1" cellspacing="1" | {| border="0" cellpadding="1" cellspacing="1" width=100% | ||
!width="40%"|Location!!width="30%"|Image!!Logic Notes | !width="40%"|Location!!width="30%"|Image!!style="text-align:center"|Logic Notes | ||
|- | |- | ||
|| | || ZD Behind King Zora Beehive || [[File:Zd behind king zora beehive.jpg|400px]]||style="text-align:center"|is_child and can_break_beehive | ||
|- | |- | ||
|} | |} | ||
== Zoras Fountain == | == Zoras Fountain == | ||
{| border="0" cellpadding="1" cellspacing="1" | {| border="0" cellpadding="1" cellspacing="1" width=100% | ||
!width="40%"|Location!!width="30%"|Image!!Logic Notes | !width="40%"|Location!!width="30%"|Image!!style="text-align:center"|Logic Notes | ||
|- | |- | ||
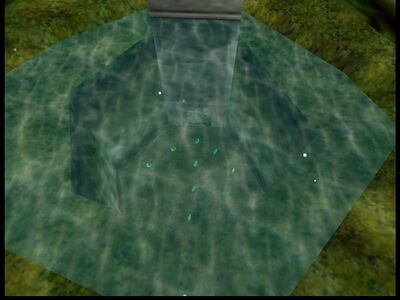
|| ZF Bottom Freestanding Rupee 1 || | || ZF Bottom Freestanding Rupee 1-18 || [[File:Zf bottom rupees.jpg|400px]]||style="text-align:center"|There are 18 green rupees at the bottom of the fountain. These have the same requirements as the center freestanding heart piece. | ||
|- | |- | ||
|| | |} | ||
== KF Storms Grotto == | |||
{| border="0" cellpadding="1" cellspacing="1" width=100% | |||
!width="40%"|Location!!width="30%"|Image!!style="text-align:center"|Logic Notes | |||
|- | |- | ||
|| | || KF Storms Grotto Beehive 1 || See [[Freestanding_Rupee_and_Heart_Locations#Grotto Beehives|grotto beehives]]||style="text-align:center"|can_break_beehive | ||
|- | |- | ||
|| | || KF Storms Grotto Beehive 2 || See [[Freestanding_Rupee_and_Heart_Locations#Grotto Beehives|grotto beehives]]||style="text-align:center"|can_break_beehive | ||
|- | |- | ||
|| | |} | ||
== LW Near Shortcuts Grotto == | |||
{| border="0" cellpadding="1" cellspacing="1" width=100% | |||
!width="40%"|Location!!width="30%"|Image!!style="text-align:center"|Logic Notes | |||
|- | |- | ||
|| | || LW Near Shortcuts Grotto Beehive 1 || See [[Freestanding_Rupee_and_Heart_Locations#Grotto Beehives|grotto beehives]]||style="text-align:center"|can_break_beehive | ||
|- | |- | ||
|| | || LW Near Shortcuts Grotto Beehive 2 || See [[Freestanding_Rupee_and_Heart_Locations#Grotto Beehives|grotto beehives]]||style="text-align:center"|can_break_beehive | ||
|- | |- | ||
|| | |} | ||
== LW Scrubs Grotto == | |||
{| border="0" cellpadding="1" cellspacing="1" width=100% | |||
!width="40%"|Location!!width="30%"|Image!!style="text-align:center"|Logic Notes | |||
|- | |- | ||
|| | || LW Scrubs Grotto Beehive || See [[Freestanding_Rupee_and_Heart_Locations#Grotto Beehives|grotto beehives]]||style="text-align:center"|can_break_beehive | ||
|- | |- | ||
|| | |} | ||
== SFM Storms Grotto == | |||
{| border="0" cellpadding="1" cellspacing="1" width=100% | |||
!width="40%"|Location!!width="30%"|Image!!style="text-align:center"|Logic Notes | |||
|- | |- | ||
|| | || SFM Storms Grotto Beehive || See [[Freestanding_Rupee_and_Heart_Locations#Grotto Beehives|grotto beehives]]||style="text-align:center"|can_break_beehive | ||
|- | |- | ||
|| | |} | ||
== LLR Grotto == | |||
{| border="0" cellpadding="1" cellspacing="1" width=100% | |||
!width="40%"|Location!!width="30%"|Image!!style="text-align:center"|Logic Notes | |||
|- | |- | ||
|| | || LLR Grotto Beehive || See [[Freestanding_Rupee_and_Heart_Locations#Grotto Beehives|grotto beehives]]||style="text-align:center"|can_break_beehive | ||
|- | |- | ||
| | |} | ||
| | == HF Southeast Grotto == | ||
|| | {| border="0" cellpadding="1" cellspacing="1" width=100% | ||
!width="40%"|Location!!width="30%"|Image!!style="text-align:center"|Logic Notes | |||
|- | |- | ||
|| | || HF Southeast Grotto Beehive 1 || See [[Freestanding_Rupee_and_Heart_Locations#Grotto Beehives|grotto beehives]]||style="text-align:center"|can_break_beehive | ||
|- | |- | ||
|| | || HF Southeast Grotto Beehive 2 || See [[Freestanding_Rupee_and_Heart_Locations#Grotto Beehives|grotto beehives]]||style="text-align:center"|can_break_beehive | ||
|- | |||
| | |||
|- | |- | ||
|} | |} | ||
== | == HF Open Grotto == | ||
{| border="0" cellpadding="1" cellspacing="1" | {| border="0" cellpadding="1" cellspacing="1" width=100% | ||
!width="40%"|Location!!width="30%"|Image!!Logic Notes | !width="40%"|Location!!width="30%"|Image!!style="text-align:center"|Logic Notes | ||
|- | |- | ||
|| | || HF Open Grotto Beehive 1 || See [[Freestanding_Rupee_and_Heart_Locations#Grotto Beehives|grotto beehives]]||style="text-align:center"|can_break_beehive | ||
|- | |- | ||
|| | || HF Open Grotto Beehive 2 || See [[Freestanding_Rupee_and_Heart_Locations#Grotto Beehives|grotto beehives]]||style="text-align:center"|can_break_beehive | ||
|- | |- | ||
| | |} | ||
== HF Inside Fence Grotto == | |||
{| border="0" cellpadding="1" cellspacing="1" width=100% | |||
!width="40%"|Location!!width="30%"|Image!!style="text-align:center"|Logic Notes | |||
|- | |- | ||
|| | || HF Inside Fence Grotto Beehive || See [[Freestanding_Rupee_and_Heart_Locations#Grotto Beehives|grotto beehives]]||style="text-align:center"|can_break_beehive | ||
|- | |- | ||
| | |} | ||
== HF Near Market Grotto == | |||
{| border="0" cellpadding="1" cellspacing="1" width=100% | |||
!width="40%"|Location!!width="30%"|Image!!style="text-align:center"|Logic Notes | |||
|- | |- | ||
|| | || HF Near Market Grotto Beehive 1 || See [[Freestanding_Rupee_and_Heart_Locations#Grotto Beehives|grotto beehives]]||style="text-align:center"|can_break_beehive | ||
|- | |- | ||
|| | || HF Near Market Grotto Beehive 2 || See [[Freestanding_Rupee_and_Heart_Locations#Grotto Beehives|grotto beehives]]||style="text-align:center"|can_break_beehive | ||
|- | |- | ||
| | |} | ||
| | == Kak Open Grotto == | ||
|| | {| border="0" cellpadding="1" cellspacing="1" width=100% | ||
!width="40%"|Location!!width="30%"|Image!!style="text-align:center"|Logic Notes | |||
|- | |- | ||
|| | || Kak Open Grotto Beehive 1 || See [[Freestanding_Rupee_and_Heart_Locations#Grotto Beehives|grotto beehives]]||style="text-align:center"|can_break_beehive | ||
|- | |- | ||
|| | || Kak Open Grotto Beehive 2 || See [[Freestanding_Rupee_and_Heart_Locations#Grotto Beehives|grotto beehives]]||style="text-align:center"|can_break_beehive | ||
|- | |- | ||
|} | |} | ||
== | |||
{| border="0" cellpadding="1" cellspacing="1" | == DMT Cow Grotto == | ||
!width="40%"|Location!!width="30%"|Image!!Logic Notes | See [[Grottos#Death_Mountain_Trail:_2_Grottos|this link]] on how to access the grotto. | ||
{| border="0" cellpadding="1" cellspacing="1" width=100% | |||
!width="40%"|Location!!width="30%"|Image!!style="text-align:center"|Logic Notes | |||
|- | |- | ||
|| | || DMT Cow Grotto Rupee Circle Green Rupee 1</br>DMT Cow Grotto Rupee Circle Green Rupee 2</br>DMT Cow Grotto Rupee Circle Green Rupee 3</br>DMT Cow Grotto Rupee Circle Green Rupee 4</br>DMT Cow Grotto Rupee Circle Green Rupee 5</br>DMT Cow Grotto Rupee Circle Green Rupee 6</br>DMT Cow Grotto Rupee Circle Red Rupee || [[File:Dmt cow grotto rupees.jpg|400px]]||style="text-align:center"|True | ||
|- | |- | ||
|| | || DMT Cow Grotto Recovery Heart 1</br>DMT Cow Grotto Recovery Heart 2</br>DMT Cow Grotto Recovery Heart 3</br>DMT Cow Grotto Recovery Heart 4 || [[File:Dmt cow grotto recoveryhearts.jpg|400px]]||style="text-align:center"|True | ||
|- | |- | ||
|| | || DMT Cow Grotto Beehive || See [[Freestanding_Rupee_and_Heart_Locations#Grotto Beehives|grotto beehives]]||style="text-align:center"|can_break_beehive | ||
|- | |||
|- | |- | ||
|} | |} | ||
== | |||
{| border="0" cellpadding="1" cellspacing="1" | == DMT Storms Grotto == | ||
!width="40%"|Location!!width="30%"|Image!!Logic Notes | {| border="0" cellpadding="1" cellspacing="1" width=100% | ||
!width="40%"|Location!!width="30%"|Image!!style="text-align:center"|Logic Notes | |||
|- | |- | ||
|| | || DMT Storms Grotto Beehive 1 || See [[Freestanding_Rupee_and_Heart_Locations#Grotto Beehives|grotto beehives]]||style="text-align:center"|can_break_beehive | ||
|- | |- | ||
|| | || DMT Storms Grotto Beehive 2 || See [[Freestanding_Rupee_and_Heart_Locations#Grotto Beehives|grotto beehives]]||style="text-align:center"|can_break_beehive | ||
|- | |- | ||
|} | |} | ||
== | |||
{| border="0" cellpadding="1" cellspacing="1" | == GV Octorok Grotto == | ||
!width="40%"|Location!!width="30%"|Image!!Logic Notes | See [[Grottos#Gerudo_Valley:_2_Grottos|this link]] on how to access the grotto. | ||
{| border="0" cellpadding="1" cellspacing="1" width=100% | |||
!width="40%"|Location!!width="30%"|Image!!style="text-align:center"|Logic Notes | |||
|- | |- | ||
|| | || GV Octorok Grotto Red Rupee</br>GV Octorok Grotto Blue Rupee 1</br>GV Octorok Grotto Blue Rupee 2</br>GV Octorok Grotto Blue Rupee 3</br>GV Octorok Grotto Green Rupee 1</br>GV Octorok Grotto Green Rupee 2</br>GV Octorok Grotto Green Rupee 3</br>GV Octorok Grotto Green Rupee 4 || [[File:Gv octorok grotto rupees.jpg|400px]]||style="text-align:center"|True | ||
|- | |- | ||
|} | |} | ||
== | |||
{| border="0" cellpadding="1" cellspacing="1" | == GV Storms Grotto == | ||
!width="40%"|Location!!width="30%"|Image!!Logic Notes | {| border="0" cellpadding="1" cellspacing="1" width=100% | ||
!width="40%"|Location!!width="30%"|Image!!style="text-align:center"|Logic Notes | |||
|- | |- | ||
|| | || GV Storms Grotto Beehive || See [[Freestanding_Rupee_and_Heart_Locations#Grotto Beehives|grotto beehives]]||style="text-align:center"|can_break_beehive | ||
|- | |- | ||
|} | |} | ||
== | == DMC Upper Grotto == | ||
{| border="0" cellpadding="1" cellspacing="1" | {| border="0" cellpadding="1" cellspacing="1" width=100% | ||
!width="40%"|Location!!width="30%"|Image!!Logic Notes | !width="40%"|Location!!width="30%"|Image!!style="text-align:center"|Logic Notes | ||
|- | |- | ||
|| | || DMC Upper Grotto Beehive 1 || See [[Freestanding_Rupee_and_Heart_Locations#Grotto Beehives|grotto beehives]]||style="text-align:center"|can_break_beehive | ||
|- | |- | ||
|| | || DMC Upper Grotto Beehive 2 || See [[Freestanding_Rupee_and_Heart_Locations#Grotto Beehives|grotto beehives]]||style="text-align:center"|can_break_beehive | ||
|- | |- | ||
|} | |} | ||
== | == DMC Hammer Grotto == | ||
{| border="0" cellpadding="1" cellspacing="1" | {| border="0" cellpadding="1" cellspacing="1" width=100% | ||
!width="40%"|Location!!width="30%"|Image!!Logic Notes | !width="40%"|Location!!width="30%"|Image!!style="text-align:center"|Logic Notes | ||
|- | |- | ||
|| | || DMC Hammer Grotto Beehive || See [[Freestanding_Rupee_and_Heart_Locations#Grotto Beehives|grotto beehives]]||style="text-align:center"|can_break_beehive | ||
|- | |- | ||
|} | |} | ||
== | == ZR Open Grotto == | ||
{| border="0" cellpadding="1" cellspacing="1" | {| border="0" cellpadding="1" cellspacing="1" width=100% | ||
!width="40%"|Location!!width="30%"|Image!!Logic Notes | !width="40%"|Location!!width="30%"|Image!!style="text-align:center"|Logic Notes | ||
|- | |- | ||
|| | || ZR Open Grotto Beehive 1 || See [[Freestanding_Rupee_and_Heart_Locations#Grotto Beehives|grotto beehives]]||style="text-align:center"|can_break_beehive | ||
|- | |- | ||
|| | || ZR Open Grotto Beehive 2 || See [[Freestanding_Rupee_and_Heart_Locations#Grotto Beehives|grotto beehives]]||style="text-align:center"|can_break_beehive | ||
|- | |- | ||
|} | |} | ||
== | == ZR Storms Grotto == | ||
{| border="0" cellpadding="1" cellspacing="1" | {| border="0" cellpadding="1" cellspacing="1" width=100% | ||
!width="40%"|Location!!width="30%"|Image!!Logic Notes | !width="40%"|Location!!width="30%"|Image!!style="text-align:center"|Logic Notes | ||
|- | |- | ||
|| | || ZR Storms Grotto Beehive || See [[Freestanding_Rupee_and_Heart_Locations#Grotto Beehives|grotto beehives]]||style="text-align:center"|can_break_beehive | ||
|- | |- | ||
|| | |} | ||
== LH Grotto == | |||
{| border="0" cellpadding="1" cellspacing="1" width=100% | |||
!width="40%"|Location!!width="30%"|Image!!style="text-align:center"|Logic Notes | |||
|- | |- | ||
|| | || LH Grotto Beehive || See [[Freestanding_Rupee_and_Heart_Locations#Grotto Beehives|grotto beehives]]||style="text-align:center"|can_break_beehive | ||
|- | |- | ||
|} | |} | ||
== | == Deku Tree == | ||
{| border="0" cellpadding="1" cellspacing="1" | {| border="0" cellpadding="1" cellspacing="1" width=100% | ||
!width="40%"|Location!!width="30%"|Image!!Logic Notes | !width="40%"|Location!!width="30%"|Image!!style="text-align:center"|Logic Notes | ||
|- | |- | ||
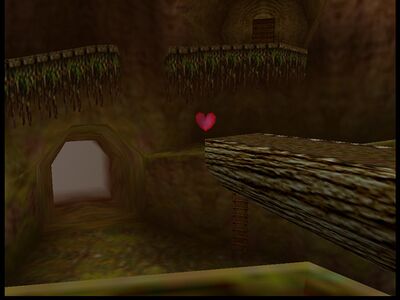
|| | || Deku Tree Walk the Plank Recovery Heart || [[File:Deku walk the plank heart.jpg|400px]]||style="text-align:center"|True | ||
|- | |- | ||
|| | || Deku Tree Leap Recovery Heart || [[File:Deku leap heart.jpg|400px]]||style="text-align:center"|is_adult or can_child_attack or Nuts | ||
|- | |- | ||
|| | || Deku Tree 2-3-1 Scrubs Recovery Heart 1</br>Deku Tree 2-3-1 Scrubs Recovery Heart 2</br>Deku Tree 2-3-1 Scrubs Recovery Heart 3 || [[File:Deku scrubs hearts.jpg|400px]]||style="text-align:center"|True | ||
|- | |- | ||
|} | |} | ||
== | |||
{| border="0" cellpadding="1" cellspacing="1" | == Dodongos Cavern == | ||
!width="40%"|Location!!width="30%"|Image!!Logic Notes | {| border="0" cellpadding="1" cellspacing="1" width=100% | ||
!width="40%"|Location!!width="30%"|Image!!style="text-align:center"|Logic Notes | |||
|- | |- | ||
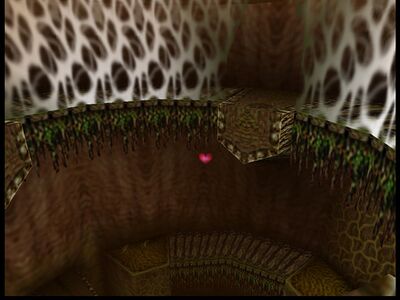
|| | || Dodongos Cavern Lizalfos Hidden Recovery Heart || [[File:Dc lizalfos hidden heart.jpg|400px]]||style="text-align:center"|In the lower lizalfos fight there is a hidden recovery heart behind the left side of the lavafall. | ||
|- | |- | ||
|| | || Dodongos Cavern Lizalfos Recovery Heart 1</br>Dodongos Cavern Lizalfos Recovery Heart 2 || [[File:Dc upper lizalfos hearts.jpg|400px]]||style="text-align:center"|True | ||
|- | |- | ||
|| | || Dodongos Cavern Behind Block Recovery Heart || [[File:Dc behind block heart.jpg|400px]]||style="text-align:center"|True | ||
|- | |||
| | |||
|- | |- | ||
|} | |} | ||
== | |||
{| border="0" cellpadding="1" cellspacing="1" | == Colossus Grotto == | ||
!width="40%"|Location!!width="30%"|Image!!Logic Notes | {| border="0" cellpadding="1" cellspacing="1" width=100% | ||
!width="40%"|Location!!width="30%"|Image!!style="text-align:center"|Logic Notes | |||
|- | |- | ||
|| | || Colossus Grotto Beehive || See [[Freestanding_Rupee_and_Heart_Locations#Grotto Beehives|grotto beehives]]||style="text-align:center"|can_break_beehive | ||
|- | |||
| | |||
|- | |- | ||
|} | |} | ||
== | == Forest Temple == | ||
{| border="0" cellpadding="1" cellspacing="1" | {| border="0" cellpadding="1" cellspacing="1" width=100% | ||
!width="40%"|Location!!width="30%"|Image!!Logic Notes | !width="40%"|Location!!width="30%"|Image!!style="text-align:center"|Logic Notes | ||
|- | |- | ||
|| | || Forest Temple Well Recovery Heart 1</br>Forest Temple Well Recovery Heart 2 || [[File:Forest well hearts.jpg|400px]]||style="text-align:center"|True | ||
|- | |- | ||
|| | || Forest Temple Courtyard Recovery Heart 1</br>Forest Temple Courtyard Recovery Heart 2 || [[File:Forest courtyard heart.jpg|400px]]||style="text-align:center"|True | ||
|- | |- | ||
|} | |} | ||
== | |||
{| border="0" cellpadding="1" cellspacing="1" | == Fire Temple == | ||
!width="40%"|Location!!width="30%"|Image!!Logic Notes | {| border="0" cellpadding="1" cellspacing="1" width=100% | ||
!width="40%"|Location!!width="30%"|Image!!style="text-align:center"|Logic Notes | |||
|- | |- | ||
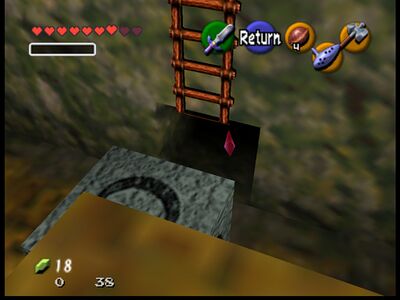
|| | || Fire Temple Elevator Room Recovery Heart 1</br>Fire Temple Elevator Room Recovery Heart 2</br>Fire Temple Elevator Room Recovery Heart 3 || [[File:Fire temple elevator room hearts.jpg|400px]] ||style="text-align:center"|(Small_Key_Fire_Temple, 3) | ||
|- | |- | ||
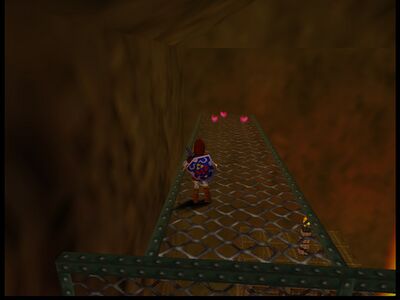
|| | || Fire Temple Eye Switch Room Recovery Heart 1</br>Fire Temple Eye Switch Room Recovery Heart 2</br>Fire Temple Eye Switch Room Recovery Heart 3 || [[File:Fire temple eye switch hearts.jpg|400px]]||style="text-align:center"|(Small_Key_Fire_Temple, 5) | ||
|- | |- | ||
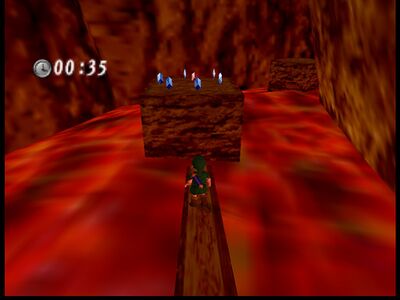
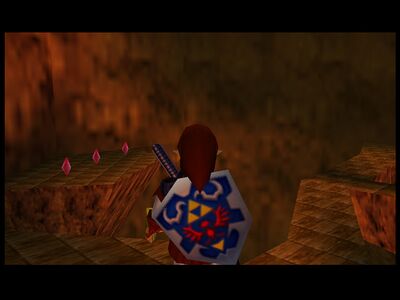
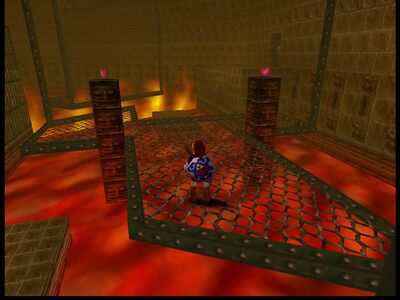
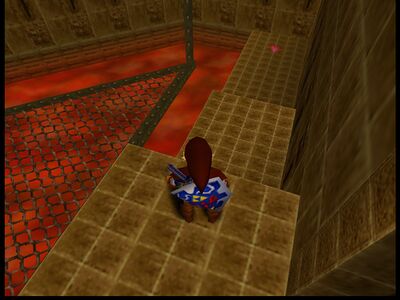
|| | || Fire Temple Moving Fire Room Recovery Heart 1</br>Fire Temple Moving Fire Room Recovery Heart 2</br>Fire Temple Moving Fire Room Recovery Heart 3 || [[File:Fire temple moving fire hearts.jpg|400px]]</br>[[File:Fire temple moving fire heart.jpg|400px]]||style="text-align:center"|(Small_Key_Fire_Temple, 6) | ||
| | |||
|- | |||
|- | |- | ||
|} | |} | ||
== | |||
{| border="0" cellpadding="1" cellspacing="1" | == Water Temple == | ||
!width="40%"|Location!!width="30%"|Image!!Logic Notes | {| border="0" cellpadding="1" cellspacing="1" width=100% | ||
!width="40%"|Location!!width="30%"|Image!!style="text-align:center"|Logic Notes | |||
|- | |- | ||
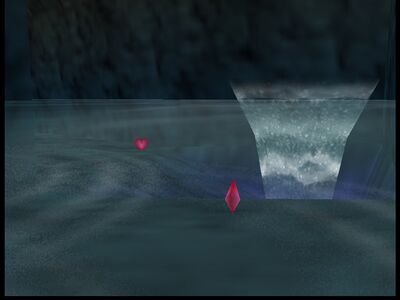
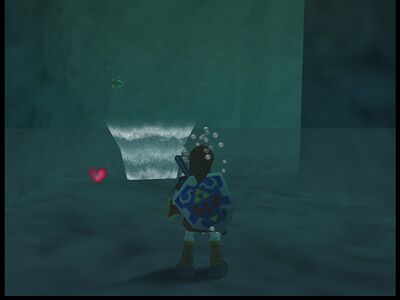
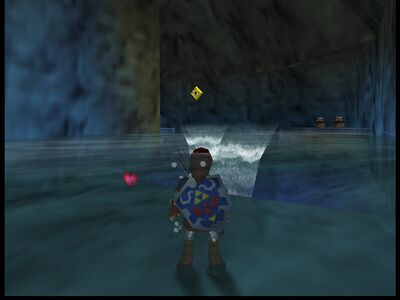
|| | || Water Temple River Recovery Heart 1</br>Water Temple River Recovery Heart 2</br>Water Temple River Recovery Heart 3</br>Water Temple River Recovery Heart 4 || [[File:Water temple river hearts1 2.jpg|400px]]</br>[[File:Water temple river heart3.jpg|400px]]</br>[[File:Water temple river heart4.jpg|400px]]||style="text-align:center"|After defeating dark link and playing Song of time to drop down into the river, there are 4 recovery hearts in the water. | ||
| | |||
|| | |||
|- | |- | ||
|} | |} | ||
== | |||
{| border="0" cellpadding="1" cellspacing="1" | == Shadow Temple == | ||
!width="40%"|Location!!width="30%"|Image!!Logic Notes | {| border="0" cellpadding="1" cellspacing="1" width=100% | ||
!width="40%"|Location!!width="30%"|Image!!style="text-align:center"|Logic Notes | |||
|- | |- | ||
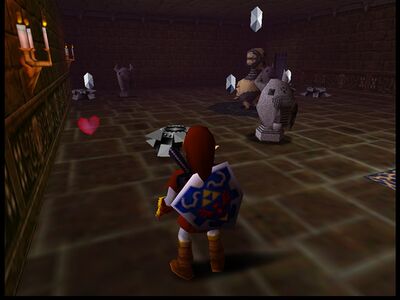
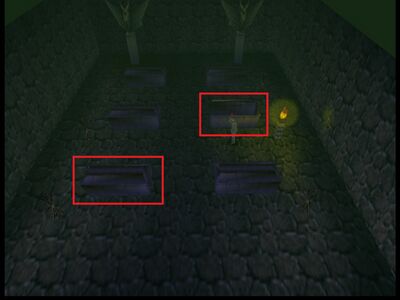
| | || Shadow Temple Invisible Blades Recovery Heart 1</br>Shadow Temple Invisible Blades Recovery Heart 2 || [[File:Shadow temple invisible blades hearts.jpg|400px]]||style="text-align:center"|The 2 recovery hearts in this room can be reached by playing Song of Time. | ||
|- | |- | ||
|| | || Shadow Temple Before Boat Freestanding Recovery Heart 1</br>Shadow Temple Before Boat Freestanding Recovery Heart 2 || [[File:Shadow temple before boat hearts.jpg|400px]]||style="text-align:center"|There are 2 recovery hearts on the platform above the boat by the Gold Skulltula that can be reached with scarecrow song and Longshot. | ||
|- | |- | ||
|| | || Shadow Temple After Boat Freestanding Recovery Heart Lower</br>Shadow Temple After Boat Freestanding Recovery Heart Upper 1</br>Shadow Temple After Boat Freestanding Recovery Heart Upper 2 || [[File:Shadow temple after boat hearts.jpg|400px]]||style="text-align:center"|The lower platform can be reached by either using scarecrow's song and Longshot to the upper platform and then jumping down, or by crossing across the statue and playing Song of Time in front of the platform.</br>The two upper recovery hearts can be reached with scarecrow's song and Longshot. The upper platform can be reached from the center section of the room without dropping the statue. | ||
|- | |- | ||
|| | || Shadow Temple 3 Spinning Pots Rupee 1</br>Shadow Temple 3 Spinning Pots Rupee 2</br>Shadow Temple 3 Spinning Pots Rupee 3</br>Shadow Temple 3 Spinning Pots Rupee 4</br>Shadow Temple 3 Spinning Pots Rupee 5</br>Shadow Temple 3 Spinning Pots Rupee 6</br>Shadow Temple 3 Spinning Pots Rupee 7</br>Shadow Temple 3 Spinning Pots Rupee 8</br>Shadow Temple 3 Spinning Pots Rupee 9 || [[File:Shadow temple spinning pots.jpg|400px]]</br>[[File:Shadow temple spinning pots rupees.jpg|400px]]||style="text-align:center"|Throw bombs (or bomb flowers) into all 3 pots to reveal 9 rupees. | ||
|- | |- | ||
|} | |} | ||
== | |||
{| border="0" cellpadding="1" cellspacing="1" | == Spirit Temple == | ||
!width="40%"|Location!!width="30%"|Image!!Logic Notes | {| border="0" cellpadding="1" cellspacing="1" width=100% | ||
!width="40%"|Location!!width="30%"|Image!!style="text-align:center"|Logic Notes | |||
|- | |- | ||
|| | || Spirit Temple Shifting Wall Recovery Heart 1</br>Spirit Temple Shifting Wall Recovery Heart 2 || [[File:Spirit temple shifting wall hearts.jpg|400px]]||style="text-align:center"|Progressive_Hookshot | ||
|- | |- | ||
|} | |} | ||
== | |||
{| border="0" cellpadding="1" cellspacing="1" | == Ganons Castle == | ||
!width="40%"|Location!!width="30%"|Image!!Logic Notes | {| border="0" cellpadding="1" cellspacing="1" width=100% | ||
!width="40%"|Location!!width="30%"|Image!!style="text-align:center"|Logic Notes | |||
|- | |- | ||
|| | || Ganons Castle Fire Trial Recovery Heart || [[File:Ganons castle fire trial hearts.jpg|400px]]||style="text-align:center"|True | ||
|- | |- | ||
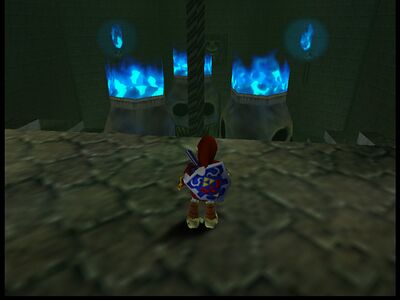
|| | || Ganons Castle Shadow Trial Recovery Heart 1</br>Ganons Castle Shadow Trial Recovery Heart 2</br>Ganons Castle Shadow Trial Recovery Heart 3 || [[File:Ganons castle shadow trial hearts.jpg|400px]]||style="text-align:center"|can_use(Lens_of_Truth) and ( can_use(Fire_Arrows) or (can_use(Longshot) and (Hover_Boots or can_use(Dins_Fire)))) | ||
|- | |- | ||
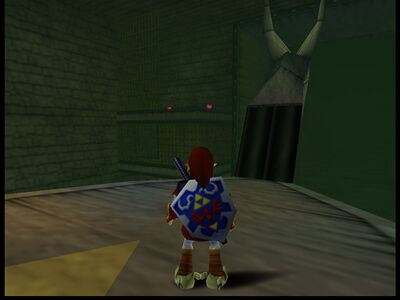
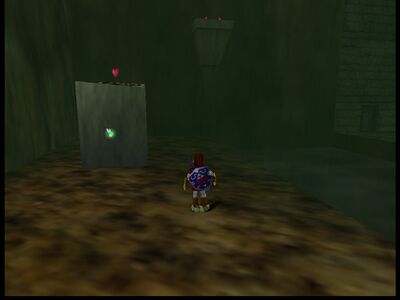
|| | || Ganons Castle Spirit Trial Recovery Heart || [[File:Ganons castle spirit trial heart.jpg|400px]]||style="text-align:center"|True | ||
|- | |- | ||
| | |} | ||
| | |||
|| | == Bottom of the Well == | ||
{| border="0" cellpadding="1" cellspacing="1" width=100% | |||
!width="40%"|Location!!width="30%"|Image!!style="text-align:center"|Logic Notes | |||
|- | |- | ||
|| Bottom of the Well | || Bottom of the Well Coffin Recovery Heart 1</br>Bottom of the Well Coffin Recovery Heart 2 || [[File:Botw coffin rupees.jpg|400px]] ||style="text-align:center"|Sticks or can_use(Dins_Fire) | ||
|- | |- | ||
|| Bottom of the Well Center Room Pit Fall Rupee 5 || | || Bottom of the Well Center Room Pit Fall Rupee 1</br>Bottom of the Well Center Room Pit Fall Rupee 2</br>Bottom of the Well Center Room Pit Fall Rupee 3</br>Bottom of the Well Center Room Pit Fall Rupee 4</br>Bottom of the Well Center Room Pit Fall Rupee 5 || [[File:Botw center room pitfall rupees.jpg|400px]]||style="text-align:center"|logic_lens_botw or can_use(Lens_of_Truth) | ||
|- | |- | ||
|} | |} | ||
== Gerudo Training Ground | |||
{| border="0" cellpadding="1" cellspacing="1" | == Gerudo Training Ground == | ||
!width="40%"|Location!!width="30%"|Image!!Logic Notes | {| border="0" cellpadding="1" cellspacing="1" width=100% | ||
!width="40%"|Location!!width="30%"|Image!!style="text-align:center"|Logic Notes | |||
|- | |- | ||
|| Gerudo Training Ground Beamos Recovery Heart 2 || | || Gerudo Training Ground Beamos Recovery Heart 1</br>Gerudo Training Ground Beamos Recovery Heart 2 || [[File:Gtg beamos hearts.jpg|400px]]||style="text-align:center"|True | ||
|- | |- | ||
|} | |} | ||
== Ice Cavern == | == Ice Cavern == | ||
{| border="0" cellpadding="1" cellspacing="1" | {| border="0" cellpadding="1" cellspacing="1" width=100% | ||
!width="40%"|Location!!width="30%"|Image!!Logic Notes | !width="40%"|Location!!width="30%"|Image!!style="text-align:center"|Logic Notes | ||
|- | |- | ||
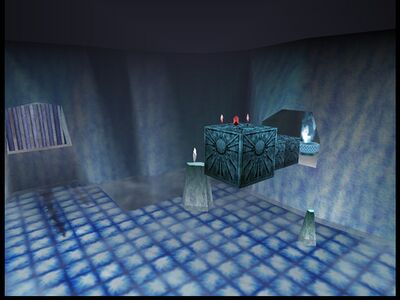
|| Ice Cavern | || Ice Cavern Freestanding Blue Rupee || [[File:Ice cavern freestanding rupee.jpg|400px]]||style="text-align:center"|Blue_Fire | ||
|- | |- | ||
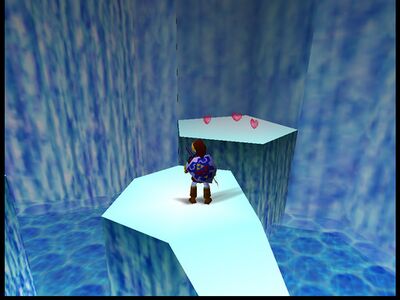
|| Ice Cavern | || Ice Cavern Map Room Recovery Heart 1</br>Ice Cavern Map Room Recovery Heart 2</br>Ice Cavern Map Room Recovery Heart 3 || [[File:Ice cavern map room hearts.jpg|400px]]||style="text-align:center"|is_adult | ||
|- | |- | ||
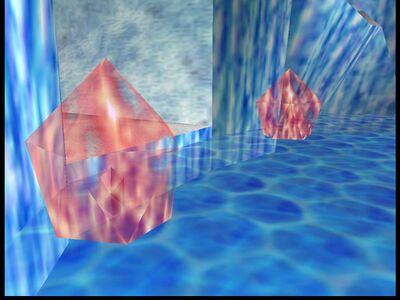
|| Ice Cavern Block Room Red Rupee 3 || | || Ice Cavern Block Room Red Rupee 1</br>Ice Cavern Block Room Red Rupee 2</br>Ice Cavern Block Room Red Rupee 3 || [[File:Ice cavern block room rupees.jpg|400px]]||style="text-align:center"|The floating rupees in this room can be obtained by playing Song of Time to create a platform allowing link to grab them. If here as a child, they can be reached with Boomerang as well. | ||
|- | |- | ||
|} | |} | ||
== Grotto Beehives == | |||
There are 3 different types of grottos containing beehives. | |||
* Generic grottos: Contain 2 beehives in the back of the grotto. | |||
[[File:Grotto generic beehive.jpg|400px]] | |||
* 2 scrub grottos: Contain 1 beehive. There are 2 different versions of these grottos, with the beehive on the left or right side | |||
[[File:Grotto 2 scrub left.jpg|400px]] | |||
[[File:Grotto 2 scrub right.jpg|400px]] | |||
* 3 scrub grottos: Contain 1 beehive on the wall above the right scrub | |||
[[File:Grotto 3 scrub beehive.jpg|400px]] | |||
Latest revision as of 19:06, 20 March 2022
Kokiri Forest
KF Sarias House
| Location | Image | Logic Notes |
|---|---|---|
| KF Sarias Recovery Heart 1 KF Sarias Recovery Heart 2 KF Sarias Recovery Heart 3 KF Sarias Recovery Heart 4 |
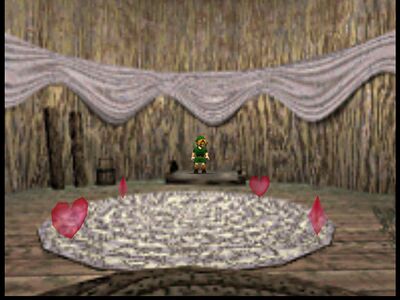 |
True |
KF Kokiri Shop
| Location | Image | Logic Notes |
|---|---|---|
| KF Shop Invisible Rupee | 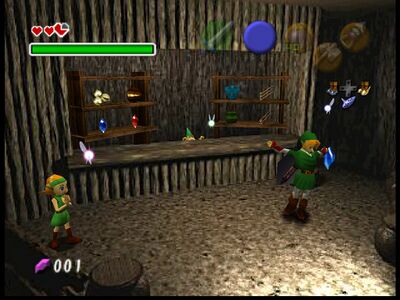 |
True |
LW Beyond Mido
Lake Hylia
LH Lab
| Location | Image | Logic Notes |
|---|---|---|
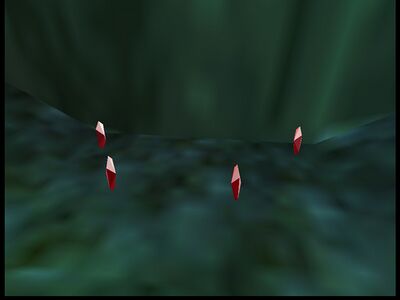
| LH Lab Dive Rupee 1 LH Lab Dive Rupee 2 LH Lab Dive Rupee 3 |
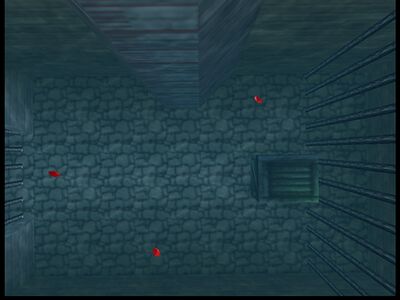 |
The 3 red rupees at the bottom of the lab can be reached with Gold Scale or Iron Boots (adult) |
Graveyard Dampes Grave
| Location | Image | Logic Notes |
|---|---|---|
| Graveyard Dampe Race Rupee 1 Graveyard Dampe Race Rupee 2 Graveyard Dampe Race Rupee 3 Graveyard Dampe Race Rupee 4 Graveyard Dampe Race Rupee 5 Graveyard Dampe Race Rupee 6 Graveyard Dampe Race Rupee 7 Graveyard Dampe Race Rupee 8 |
Error creating thumbnail: Unable to save thumbnail to destination | There are 8 freestanding rupees in Dampe's race, locations are noted on the map. |
Death Mountain
Goron City
DMC Pierre Platform
DMC Central Nearby
Zora River
Zoras Domain
| Location | Image | Logic Notes |
|---|---|---|
| ZD In Front of King Zora Beehive 1 | 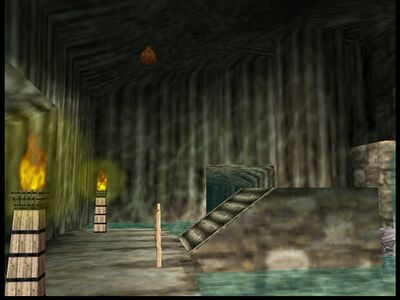 |
is_child and can_break_beehive |
| ZD In Front of King Zora Beehive 2 | 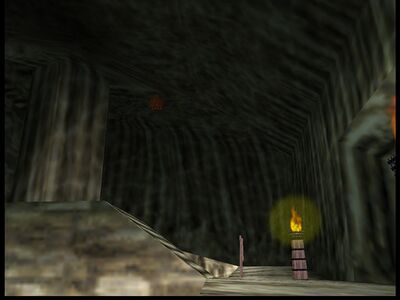 |
is_child and can_break_beehive |
ZD Behind King Zora
| Location | Image | Logic Notes |
|---|---|---|
| ZD Behind King Zora Beehive | 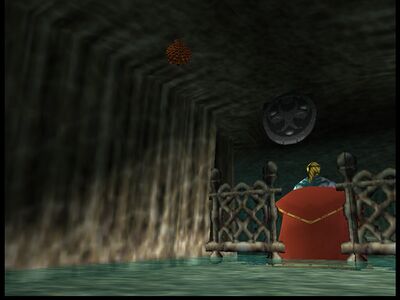 |
is_child and can_break_beehive |
Zoras Fountain
| Location | Image | Logic Notes |
|---|---|---|
| ZF Bottom Freestanding Rupee 1-18 | 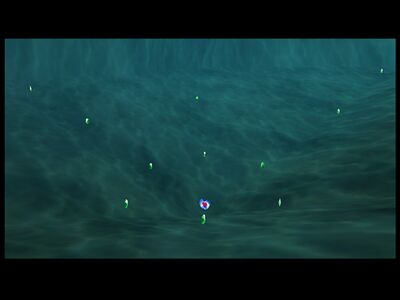 |
There are 18 green rupees at the bottom of the fountain. These have the same requirements as the center freestanding heart piece. |
KF Storms Grotto
| Location | Image | Logic Notes |
|---|---|---|
| KF Storms Grotto Beehive 1 | See grotto beehives | can_break_beehive |
| KF Storms Grotto Beehive 2 | See grotto beehives | can_break_beehive |
LW Near Shortcuts Grotto
| Location | Image | Logic Notes |
|---|---|---|
| LW Near Shortcuts Grotto Beehive 1 | See grotto beehives | can_break_beehive |
| LW Near Shortcuts Grotto Beehive 2 | See grotto beehives | can_break_beehive |
LW Scrubs Grotto
| Location | Image | Logic Notes |
|---|---|---|
| LW Scrubs Grotto Beehive | See grotto beehives | can_break_beehive |
SFM Storms Grotto
| Location | Image | Logic Notes |
|---|---|---|
| SFM Storms Grotto Beehive | See grotto beehives | can_break_beehive |
LLR Grotto
| Location | Image | Logic Notes |
|---|---|---|
| LLR Grotto Beehive | See grotto beehives | can_break_beehive |
HF Southeast Grotto
| Location | Image | Logic Notes |
|---|---|---|
| HF Southeast Grotto Beehive 1 | See grotto beehives | can_break_beehive |
| HF Southeast Grotto Beehive 2 | See grotto beehives | can_break_beehive |
HF Open Grotto
| Location | Image | Logic Notes |
|---|---|---|
| HF Open Grotto Beehive 1 | See grotto beehives | can_break_beehive |
| HF Open Grotto Beehive 2 | See grotto beehives | can_break_beehive |
HF Inside Fence Grotto
| Location | Image | Logic Notes |
|---|---|---|
| HF Inside Fence Grotto Beehive | See grotto beehives | can_break_beehive |
HF Near Market Grotto
| Location | Image | Logic Notes |
|---|---|---|
| HF Near Market Grotto Beehive 1 | See grotto beehives | can_break_beehive |
| HF Near Market Grotto Beehive 2 | See grotto beehives | can_break_beehive |
Kak Open Grotto
| Location | Image | Logic Notes |
|---|---|---|
| Kak Open Grotto Beehive 1 | See grotto beehives | can_break_beehive |
| Kak Open Grotto Beehive 2 | See grotto beehives | can_break_beehive |
DMT Cow Grotto
See this link on how to access the grotto.
| Location | Image | Logic Notes |
|---|---|---|
| DMT Cow Grotto Rupee Circle Green Rupee 1 DMT Cow Grotto Rupee Circle Green Rupee 2 DMT Cow Grotto Rupee Circle Green Rupee 3 DMT Cow Grotto Rupee Circle Green Rupee 4 DMT Cow Grotto Rupee Circle Green Rupee 5 DMT Cow Grotto Rupee Circle Green Rupee 6 DMT Cow Grotto Rupee Circle Red Rupee |
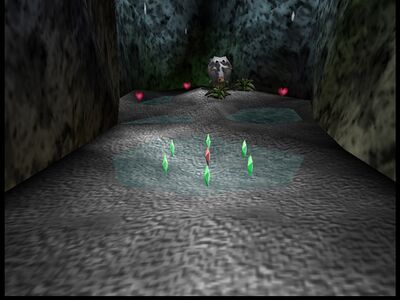 |
True |
| DMT Cow Grotto Recovery Heart 1 DMT Cow Grotto Recovery Heart 2 DMT Cow Grotto Recovery Heart 3 DMT Cow Grotto Recovery Heart 4 |
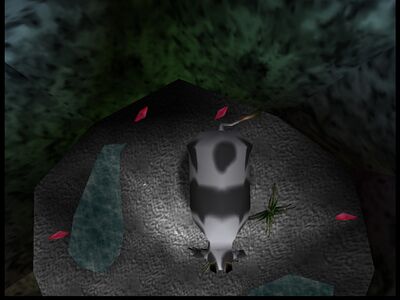 |
True |
| DMT Cow Grotto Beehive | See grotto beehives | can_break_beehive |
DMT Storms Grotto
| Location | Image | Logic Notes |
|---|---|---|
| DMT Storms Grotto Beehive 1 | See grotto beehives | can_break_beehive |
| DMT Storms Grotto Beehive 2 | See grotto beehives | can_break_beehive |
GV Octorok Grotto
See this link on how to access the grotto.
GV Storms Grotto
| Location | Image | Logic Notes |
|---|---|---|
| GV Storms Grotto Beehive | See grotto beehives | can_break_beehive |
DMC Upper Grotto
| Location | Image | Logic Notes |
|---|---|---|
| DMC Upper Grotto Beehive 1 | See grotto beehives | can_break_beehive |
| DMC Upper Grotto Beehive 2 | See grotto beehives | can_break_beehive |
DMC Hammer Grotto
| Location | Image | Logic Notes |
|---|---|---|
| DMC Hammer Grotto Beehive | See grotto beehives | can_break_beehive |
ZR Open Grotto
| Location | Image | Logic Notes |
|---|---|---|
| ZR Open Grotto Beehive 1 | See grotto beehives | can_break_beehive |
| ZR Open Grotto Beehive 2 | See grotto beehives | can_break_beehive |
ZR Storms Grotto
| Location | Image | Logic Notes |
|---|---|---|
| ZR Storms Grotto Beehive | See grotto beehives | can_break_beehive |
LH Grotto
| Location | Image | Logic Notes |
|---|---|---|
| LH Grotto Beehive | See grotto beehives | can_break_beehive |
Deku Tree
Dodongos Cavern
Colossus Grotto
| Location | Image | Logic Notes |
|---|---|---|
| Colossus Grotto Beehive | See grotto beehives | can_break_beehive |
Forest Temple
| Location | Image | Logic Notes |
|---|---|---|
| Forest Temple Well Recovery Heart 1 Forest Temple Well Recovery Heart 2 |
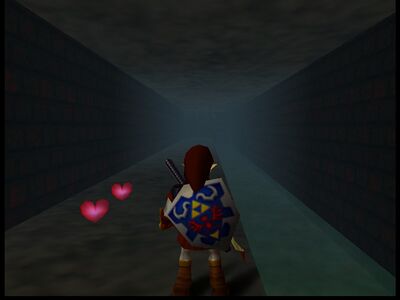 |
True |
| Forest Temple Courtyard Recovery Heart 1 Forest Temple Courtyard Recovery Heart 2 |
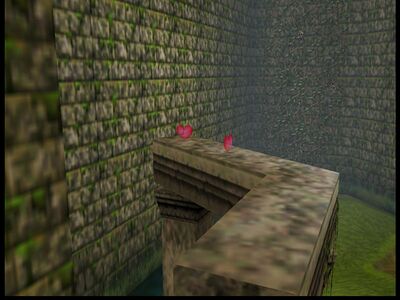 |
True |
Fire Temple
Water Temple
Shadow Temple
Spirit Temple
| Location | Image | Logic Notes |
|---|---|---|
| Spirit Temple Shifting Wall Recovery Heart 1 Spirit Temple Shifting Wall Recovery Heart 2 |
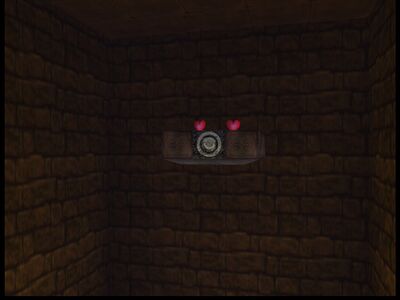 |
Progressive_Hookshot |
Ganons Castle
Bottom of the Well
Gerudo Training Ground
| Location | Image | Logic Notes |
|---|---|---|
| Gerudo Training Ground Beamos Recovery Heart 1 Gerudo Training Ground Beamos Recovery Heart 2 |
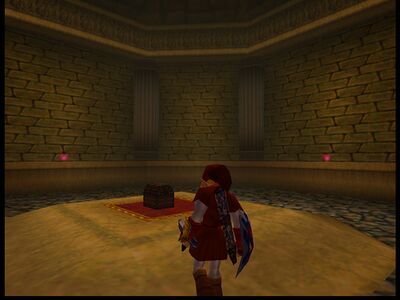 |
True |
Ice Cavern
Grotto Beehives
There are 3 different types of grottos containing beehives.
- Generic grottos: Contain 2 beehives in the back of the grotto.
- 2 scrub grottos: Contain 1 beehive. There are 2 different versions of these grottos, with the beehive on the left or right side
- 3 scrub grottos: Contain 1 beehive on the wall above the right scrub
