by Raizuto
RetroArch is the only cross-platform emulator supported by the Ocarina of Time Item Randomizer staff, and the number 1 recommended one. It is also possible to use it to play a vast number of platforms other than N64 as well. This might just make it your emulator of choice once you get used to using it.
Install RetroArch by choosing the download for your operating system. If you are using Windows and RetroArch crashes upon opening for you using the Windows 10/8/7 32bit and 64bit options, try installing the Windows XP 32bit or 64bit installations instead.
Install a RetroArch Core
Go to Load Core on the main menu.
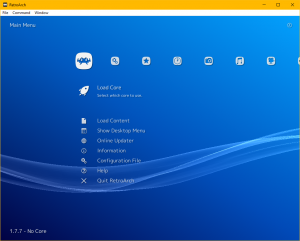
Then select Download Core...
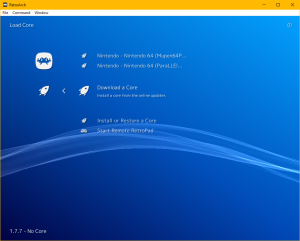
After the core index list populates, go down until you find Nintendo - Nintendo 64 (ParaLLEl N64) and install it. If this core gives you issues you can try Nintendo - Nintendo 64 (Mupen64Plus - Next) however it is likely to crash somewhat frequently. To help prevent this try changing the Max Texture Cache Size after following the rest of the guide.
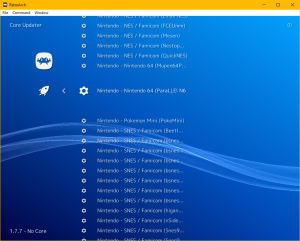
Now that the core is installed you can backspace back out to the main menu.
Configure RetroArch
Move over to the Settings column in the menu. Head down to Saving and change SaveRAM Autosave Interval to 10 seconds by selecting it and pressing the right arrow key.
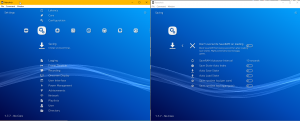
Next, go back to the Settings column and go down to Directory
-
Directory
-
Downloads
Select Downloads with Enter. You will be presented with an overview of your system partitions.
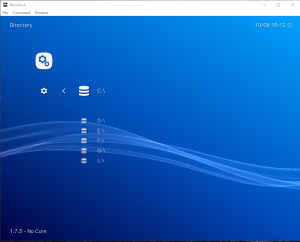
Navigate through your computer files to the folder you keep your ROMs in. They will not show up yet. Choose Use this directory anyway. If you are using the downloaded version of the Ocarina of Time Randomizer the default location for your patched ROMs is a folder called Output next to the .exe file you double click to start the randomizer.
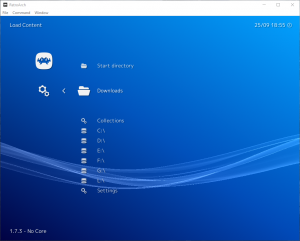
Once you have finished configuring RetroArch you must properly restart it. Do not press Esc or the X in the top right corner. Go to the far left column in the menu and move all the way down to the option near the bottom Quit Retroarch. Once you reopen RetroArch you should be able to load your ROMs in the Downloads section of the Load Content menu.
Controller Configuration
If your controls don't feel quite right, access the Quick Menu by pressing F1 while a ROM is loaded. Go down to Options and change the deadzone to 10 and analog sensitivity to 80. You may wish to make further personal adjustments as necessary as well.
HiRes Texture Packs
Keep in mind texture packs are not allowed to be active for races. HiRes Texture Packs
Tips
- To unbind any button/key hit the delete key on your keyboard in the input settings.
- Never close RA via it’s top right X, close it from far left Main Menu Quit Retroarch.
- If you want Retroarch to keep running in the background, go over to the Settings column in the menu, then down to User Interface, hit enter and set Don’t run in the background to OFF.
If your controller does not have a default profile or you are using a keyboard, the following information may be helpful.
- Don't alter the Main Menu bindings for controllers that have default profiles. Open the Quick Menu and change the button mapping there instead.
- Left side user input binds (the
Deletekey will delete any binding)- B button is equivalent to N64 A Button
- Y button is equivalent to N64 B Button
- L2 button (trigger) is equivalent to N64 Z Button
- L1 is equivalent to N64 L
- R1 is equivalent to N64 R
- Movement:
- Left analog X+ = Right
- Left analog X- = Left
- Left analog Y+ = Down
- Left analog Y- = Up
- C-Buttons/C-Stick:
- Right analog X+ = C-Right
- Right analog X- = C-Left
- Right analog Y+ = C-Down
- Right analog Y- = C-Up
Common Issues
There are several issues that crop up often when new users try out RetroArch.
No Audio
Go into the Driver Menu (first thing under the Settings Menu Column) and change the Audio Driver from xaudio to dsound. Then quit RetroArch properly via the Main Menu and restart it.
Retroarch crash when loading ROM
If using the Nintendo - Nintendo 64 (Mupen64Plus) core, try the Nintendo - Nintendo 64 (ParaLLEl N64) core instead. If using the& Nintendo - Nintendo 64 (ParaLLEl N64) core, try the Nintendo - Nintendo 64 (Mupen64Plus) core instead.
Mupen64plus Next crashes
Mupen64plus Next core is known to crash more frequently than the older mupen64plus core. This may be related to using a newer GlideN64 version, which seems to have issues with the texture cache. To help reduce how often it crashes you can try changing the Max Texture Cache Size. After loading a ROM press F1 to open the "Quick Menu" and move down to "Options" and press Enter. Move down to "Max Texture Cache Size" and press the → arrow key once. The selection should change from 8000 to 4000. If it does not, just press the key again.
Once you have changed the option, press Backspace twice to return to the "Main Menu" and select Quit Retroarch to close RetroArch. Simply run RetroArch and open the ROM again and your mupen64plus Next core should be running with a smaller texture cache, which hopefully allows you to play at least twice as long.
Boots are equipped / Ocarina pulled out randomly while walking
Go to the input menu and set 'Analog to Digital' to 'None'
One of My Buttons Won't Work
If you messed with the Main Menu User Input Binds you likely configured something wrong. It is not recommended to ever modify controller binds this way unless your controller doesn't have a built in profile. To reset your controller bindings to their default you have to load the default RetroArch.cfg again.
If you have a ROM loaded, start by pressing F1 to open the Quick Menu then press Backspace to get back to the Main Menu.
Go to the far left menu item, Main Menu. Move down to Configurations and press Enter. Select <Parent directory> and hit Enter. Scroll down to the file retroarch.default.cfg and press Enter.


