m formatting (centered thumbnails look better than plain images since there is no padding on plain images), capitalization, ridding the world of the created by the RichTextEditor |
No edit summary |
||
| Line 1: | Line 1: | ||
== Bizhawk == | == Bizhawk == | ||
| Line 16: | Line 17: | ||
5. Make sure the filename of the downloaded pack is '''''THE LEGEND OF ZELDA_HIRESTEXTURES.htc''''' | 5. Make sure the filename of the downloaded pack is '''''THE LEGEND OF ZELDA_HIRESTEXTURES.htc''''' | ||
6. Put the file in the following folder: ''' | 6. Put the file in the following folder: '''%UserProfile%\AppData\Roaming\Mupen64Plus\cache''' | ||
*If there is '''''no''''' cache folder create one! | *If there is '''''no''''' cache folder create one! | ||
Revision as of 18:06, 25 January 2019
Bizhawk
To apply texture packs in Bizhawk you need to do the following steps:
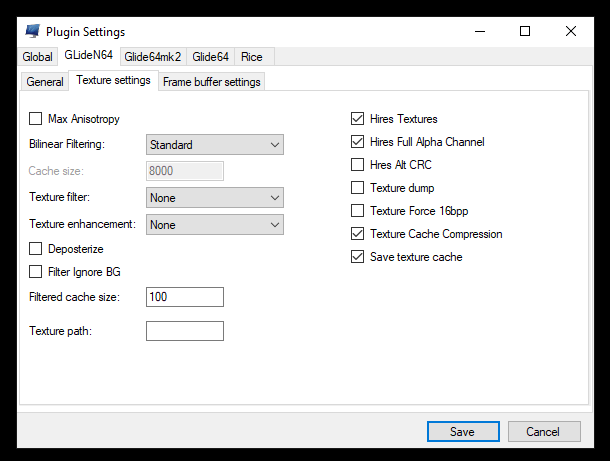
1. Start Bizhawk and open the N64 Plugin Settings
2. Select GLideN64 and select the Texture settings tab
3.Enable the following options:
HiresTextures, Hires Full Alpha Channel, Texture Cache Compression and Save Texture Cache

4. Download your favourite texture pack for GLide64 in .htc format. (e.g. the completed packs on EmuTalk)
5. Make sure the filename of the downloaded pack is THE LEGEND OF ZELDA_HIRESTEXTURES.htc
6. Put the file in the following folder: %UserProfile%\AppData\Roaming\Mupen64Plus\cache
- If there is no cache folder create one!

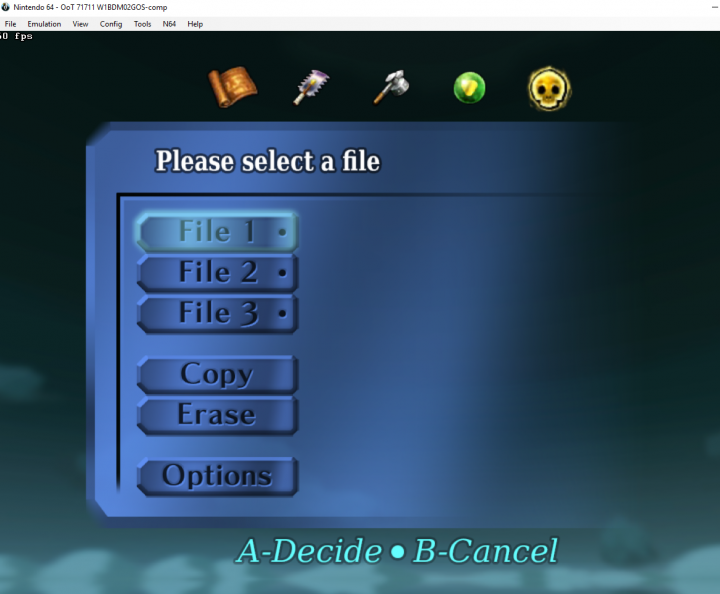
If done correctly you should immediately see the new textures:

