removed ML64 section because their website links to a website with copyrighted material |
|||
| Line 24: | Line 24: | ||
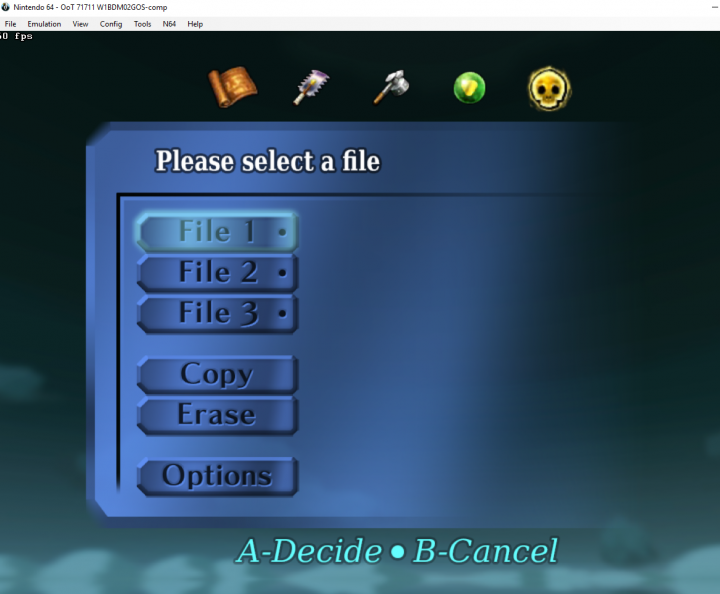
[[File:BizhawkTexturePackActive.png|thumb|center|720px|Now your texture pack should work!]] | [[File:BizhawkTexturePackActive.png|thumb|center|720px|Now your texture pack should work!]] | ||
== RetroArch == | == RetroArch == | ||
Revision as of 21:29, 18 December 2020
Please note that texture packs are not allowed to be active during races.
Bizhawk
To apply texture packs in Bizhawk you need to do the following steps:
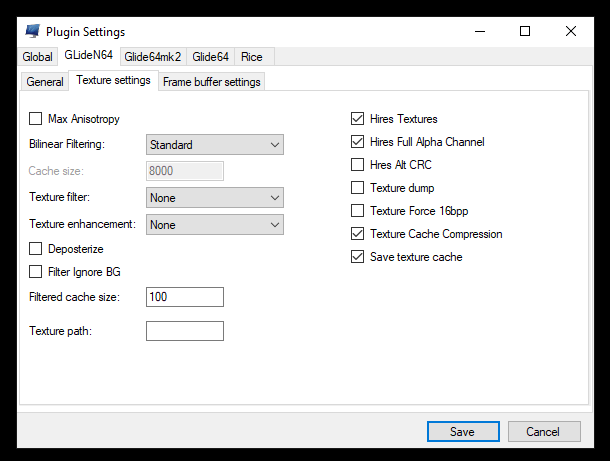
- Start Bizhawk and open the N64 Plugin Settings
- Select GLideN64 and select the Texture settings tab
- Enable the following options:
- Download your favourite texture pack for GLide64 in .htc format. (e.g. the completed packs on EmuTalk) or see the below for compiling your own using Project64.
- Make sure the filename of the downloaded pack is THE LEGEND OF ZELDA_HIRESTEXTURES.htc
- Put the file in the following folder:
%UserProfile%\AppData\Roaming\Mupen64Plus\cache- If there is no cache folder, visit
UserProfile%\AppData\Roaming\Mupen64Plus\and create one!
- If there is no cache folder, visit

If done correctly you should immediately see the new textures.

RetroArch
For hi-res texture packs on Retroarch, you will need to be running the Mupen64Plus core; ParaLLEL does not support them as it doesn't use the GLideN64 video plugin.
- You will first need to obtain a compatible .HTC texture pack (e.g. from the completed projects section on emutalk).
- Navigate to your RetroArch installation folder (By default, this is
%AppData%\RetroArchon Windows) - Navigate to
.\system\Mupen64plus\cache(create the cache folder if it doesn't exist) - Place your texture packs within the
cachefolder. The texture pack MUST be named "THE LEGEND OF ZELDA_HIRESTEXTURES.htc" - Load the ROM with the Mupen64Plus core selected
- Finally, enable the option
Quick Menu -> Options -> Use High-Res texturesandUse High-Res Full Alpha Channel - Reload the content
- You should now have your texture pack active.
Project64
There are two styles of texture packs you can use on Project64: Rice-format (a large collection of .PNG files) or precompiled .HTC packs.
These steps install GLideN64, the same GFX plugin used by most other emulators. GLideN64 is the only GFX plugin that can load .HTC texture packs. As a side effect, this also allows you to convert Rice-style PNG packs into "portable" GLideN64 caches (.HTC's)
Extract the .HTC to \Project64\Textures\GLideN64\cache\ and make sure it's name is THE LEGEND OF ZELDA_HIRESTEXTURES.htc
- If
\GLideN64\cache\doesn't exist, go to\Project64\Textures\and create it!
Download the latest GLideN64 release from https://github.com/gonetz/GLideN64/releases
- In the downloaded
\GLideN64_Public_Release_3.0\bin\Zilmar-specs\extract: - GLideN64.custom.ini
- GLideN64.ini
- GLideN64.dll
Place these 3 files into \Project64\Plugin\GFX\
Launch PJ64 and go to Options > Settings > Plugins and set your video/gfx plugin to the new GLideN64 Public Release option. Hit OK.
Next go to Options > Configure Graphics Plugin > Texture enhancement and enable:
- Use Texture Pack
- Use full transparencies
- Save enhanced texture cache to hard disk
- Compress texture cache
Precompiled Packs
Go to Options > Configure Graphics Plugin > Texture enhancement > Texture pack. Change the SECOND path (the Cache path) to \Project64\Textures\GLideN64\cache\ where you extracted the .HTC.
You are now set up to load .HTC texture caches in Project64!
Rice-style packs
Go to Options > Configure Graphics Plugin > Texture enhancement > Texture pack. Change the FIRST path (the Pack path) to \Project64\Textures\GLideN64\packs\ (where you extracted the GAME NAME FOLDER). Change the SECOND path (the Cache path) to \Project64\Textures\GLideN64\cache\ (where your created .HTC caches will be saved).
You are now set up to convert Rice-style PNG packs into GLideN64 caches, and are able to use either type!
You can delete the files from \packs\ once Project64 has been exited without any errors and been given a few extra minutes in the background to save the cache file. (Many are quite large; sometimes 1GB or more!) Check Task Manager and wait for PJ64 to finish and vanish on its own before moving the cache file around.

